Air Fryer Apple & Cinnamon Baked Oat Cups

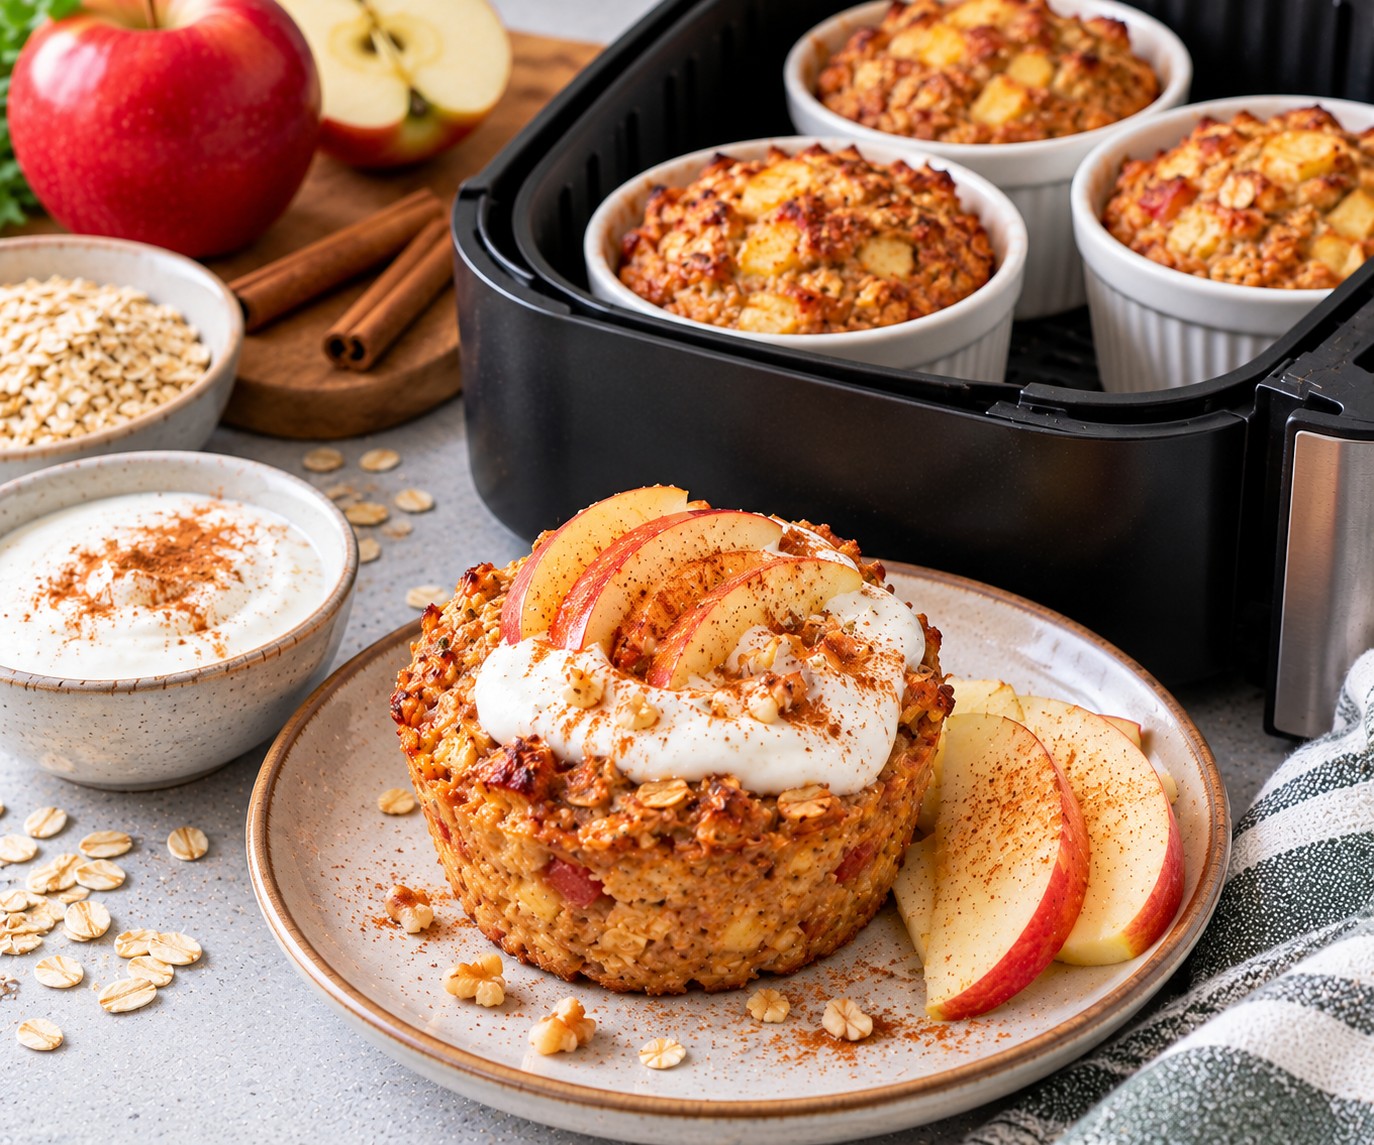
Four golden apple and cinnamon baked oat cups with Greek yoghurt beside an air fryer

These air fryer baked oats combine sweet apple, warming cinnamon and everyday porridge oats in soft, golden breakfast cups. They are easy to prepare, naturally sweetened with fruit and ideal when you want a homemade breakfast without spending much time in the kitchen.

Made with oats, eggs, milk and yoghurt, these individual baked oat cups can be served warm with a spoonful of Greek yoghurt and extra apple. They are also convenient for preparing breakfast ahead of a busy morning.

Recipe Details

  • Servings: 4
  • Makes: 4 baked oat cups
  • Preparation time: 10 minutes
  • Cooking time: 15–20 minutes
  • Total time: Approximately 30 minutes
  • Cooking method: Air fryer
  • Difficulty: Easy

Ingredients

For the baked oat cups

  • 120g porridge oats
  • 2 medium eggs
  • 120ml semi-skimmed milk
  • 100g fat-free natural Greek yoghurt
  • 1 medium apple, approximately 150g, grated
  • 1 tsp ground cinnamon
  • 1 tsp vanilla extract
  • 1 tsp baking powder
  • 1 tbsp maple syrup or honey, optional
  • A small pinch of salt
  • A little oil spray, for greasing

To serve

  • 100g fat-free natural Greek yoghurt
  • ½ apple, thinly sliced
  • A light dusting of ground cinnamon

How to Make Air Fryer Baked Oats

1. Prepare the air fryer and ramekins

Preheat the air fryer to 160°C, if required by your model.

Lightly grease four small, air-fryer-safe ramekins, approximately 150–180ml capacity each.

Check that the ramekins fit comfortably in the basket, leaving room for air to circulate. Cook in batches if necessary.

2. Prepare the apple

Wash the apple and grate it using the coarse side of a box grater.

There is no need to peel it unless preferred. Keeping the skin adds colour and texture.

3. Mix the wet ingredients

In a large bowl, whisk together the eggs, milk, Greek yoghurt, vanilla extract and maple syrup or honey, if using.

Stir in the grated apple until evenly combined.

4. Add the dry ingredients

Add the porridge oats, cinnamon, baking powder and a small pinch of salt.

Mix until combined, then leave the mixture to stand for 3–5 minutes so the oats can absorb some of the liquid.

5. Fill the ramekins

Divide the mixture evenly between the prepared ramekins.

Leave a little space at the top because the baked oats will rise slightly as they cook.

6. Air fry until golden

Place the ramekins carefully inside the air fryer basket.

Cook at 160°C for approximately 15–20 minutes, until the tops are lightly golden and the centres are set.

Insert a skewer into the centre of one cup. It should come out without wet batter. If necessary, continue cooking for another 2–3 minutes, checking regularly.

Cooking times vary depending on the size of the ramekins and the air fryer model.

7. Rest and serve

Leave the baked oat cups to stand for 3–5 minutes before serving, as the ramekins will be very hot.

Top each cup with a spoonful of Greek yoghurt, a few slices of fresh apple and a light dusting of cinnamon.

Tips for the Best Air Fryer Baked Oats

Use ordinary porridge oats. They soften nicely while retaining a little texture.

Grate the apple finely enough to distribute it evenly. This helps keep the cups moist.

Avoid overfilling the ramekins. The mixture rises slightly during cooking.

Check the centres before serving. The tops may brown before the middle has fully set.

Cook at a moderate temperature. A lower air fryer temperature helps prevent the tops from becoming too dark.

Add the yoghurt after baking. This keeps the topping cool and creamy.

Easy Budget-Friendly Variations

Apple and Raisin Baked Oats

Add 1 tablespoon of raisins to the mixture for extra sweetness.

Pear and Cinnamon Oat Cups

Replace the grated apple with a ripe grated pear.

Banana Baked Oats

Use half a mashed banana instead of the optional maple syrup or honey.

Berry Baked Oat Cups

Add a small handful of fresh or frozen berries. If using frozen berries, the cups may need a little longer to cook.

Nutty Apple Oat Cups

Sprinkle a small amount of chopped walnuts over the mixture before baking. Check for nut allergies before serving.

Can You Make Baked Oat Cups Ahead?

Yes. These individual cups are useful for preparing breakfast in advance.

Bake them, allow them to cool promptly and refrigerate in an airtight container. Keep the fresh apple and yoghurt toppings separate until serving.

How to Store and Reheat

Store the cooled baked oat cups in an airtight container in the fridge at 5°C or below for up to 2 days.

Reheat in the air fryer at 150°C for approximately 3–5 minutes, or until piping hot throughout. Reheat only once.

You can also enjoy them cold if they have been stored correctly.

The baked cups can be frozen without the toppings. Wrap them individually, freeze in a suitable container and defrost thoroughly in the fridge before reheating.

Add fresh yoghurt and apple just before serving.

Frequently Asked Questions

Can I make baked oats in the air fryer?

Yes. Small, air-fryer-safe ramekins work well for individual portions. Use a moderate temperature and check that the centres are fully set.

Do I need to blend the oats?

No. This recipe uses whole porridge oats for a slightly textured finish. If you prefer a smoother, cake-like consistency, blend the oats before mixing.

Can I make these baked oat cups without added sugar?

Yes. The grated apple adds natural sweetness, so the maple syrup or honey is optional.

Can I use plant-based milk?

Yes. An unsweetened plant-based milk can replace semi-skimmed milk, although the flavour and nutritional content may differ.

Can I use frozen berries instead of apple?

Yes. Add a small amount of frozen berries to the mixture and allow extra cooking time if needed.

Why are my baked oats wet in the middle?

They may need a little longer to cook, particularly if the ramekins are deep or the fruit releases extra moisture. Check the centre with a skewer before serving.

More Easy Breakfast and Air Fryer Recipes

For another simple homemade meal, try our Air Fryer Cottage Cheese Pizza Flatbreads.

You can also explore our Healthy High-Protein & Fibre-Rich Recipes collection for more everyday breakfast, lunch and dinner inspiration.

A Warm and Comforting Breakfast

These air fryer apple and cinnamon baked oat cups are an easy way to turn simple ingredients into a cosy homemade breakfast. Prepare a batch ahead of time and serve with Greek yoghurt and fresh fruit whenever you need a convenient morning meal.

Allergen note: Contains eggs and milk. Check the labels of your oats, yoghurt and other packaged ingredients. Use certified gluten-free oats if preparing the recipe for someone who needs to avoid gluten.
Air Fryer Turkey & Courgette Meatballs with Tomato Orzo

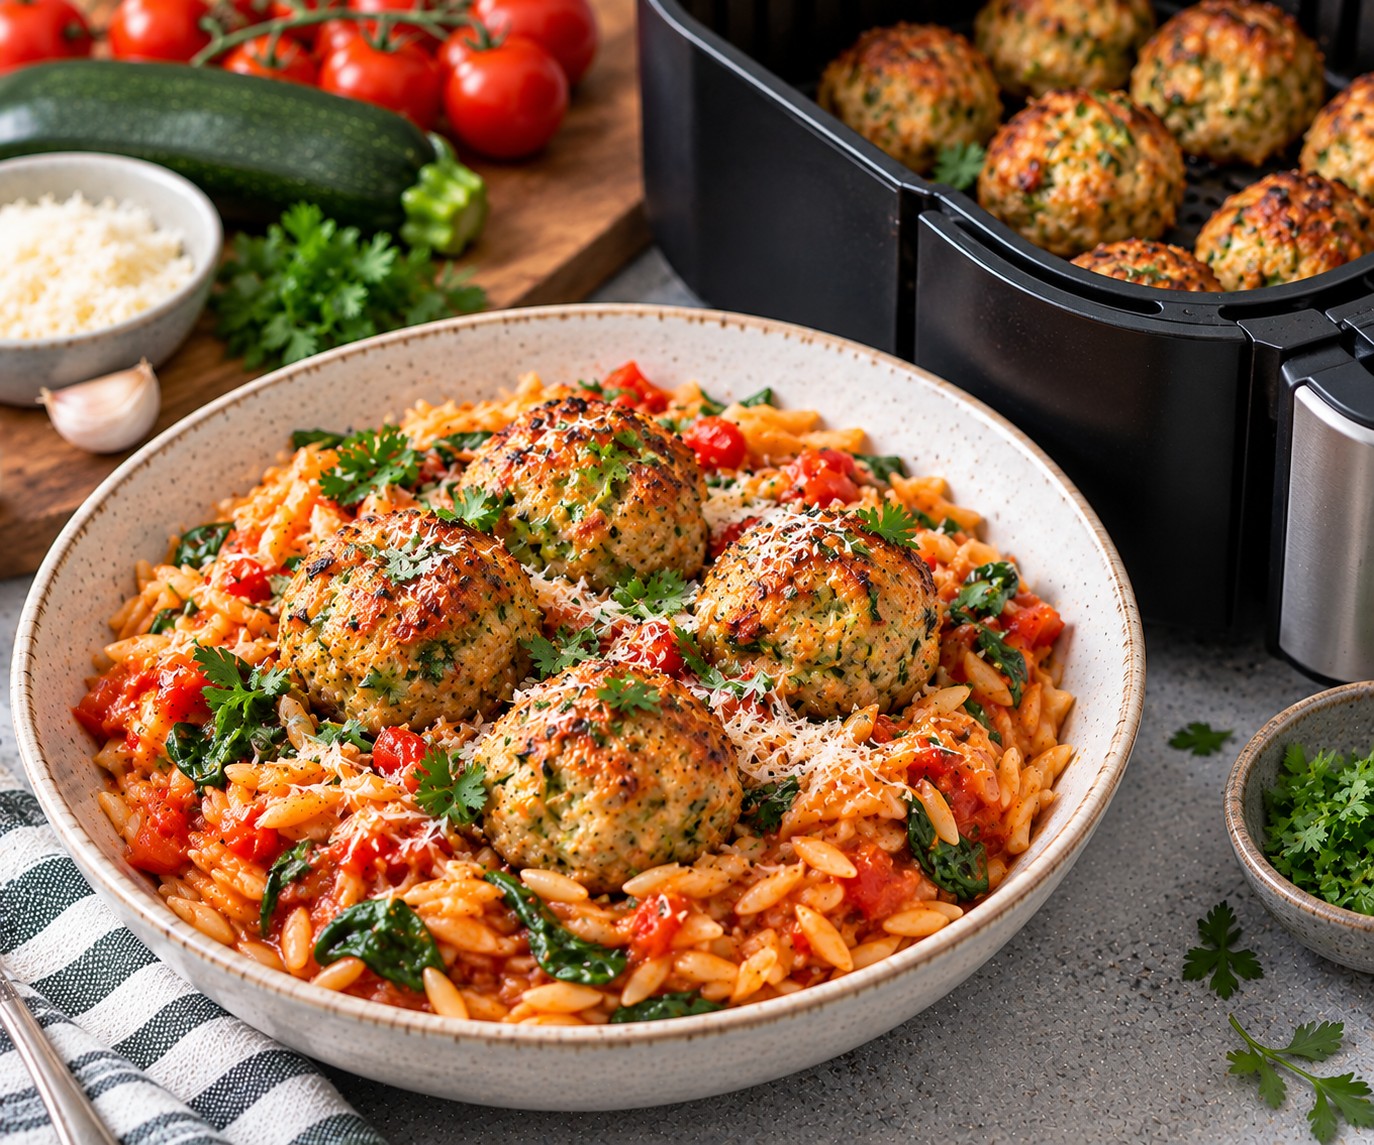
Golden air fryer turkey and courgette meatballs served over tomato and spinach orzo

These air fryer turkey meatballs are tender, lightly golden and packed with flavour. Grated courgette helps keep the meatballs moist, while a simple tomato and spinach orzo makes them into a comforting family dinner.

Made with lean turkey mince, everyday vegetables and store-cupboard seasonings, this is a practical homemade meal that feels special without requiring expensive ingredients. The meatballs cook in the air fryer, while the orzo simmers gently on the hob.

Recipe Details

  • Servings: 4
  • Preparation time: 20 minutes
  • Cooking time: Approximately 25 minutes
  • Total time: Approximately 45 minutes
  • Cooking method: Air fryer and hob
  • Makes: Approximately 16 meatballs

Ingredients

Turkey and courgette meatballs

  • 500g lean turkey mince
  • 1 medium courgette (approximately 180g), grated
  • 1 medium egg
  • 40g porridge oats, finely ground, or wholemeal breadcrumbs
  • 2 garlic cloves, crushed
  • 1 tsp dried oregano
  • 1 tsp smoked paprika
  • ½ tsp onion granules
  • 1 tbsp finely chopped fresh parsley, optional
  • Freshly ground black pepper
  • A small pinch of salt, optional
  • A little olive oil spray

Tomato and spinach orzo

  • 200g dried orzo
  • 1 small onion, finely chopped
  • 1 red pepper, diced
  • 2 garlic cloves, crushed
  • 1 tsp olive oil
  • 1 x 400g tin chopped tomatoes
  • 350ml reduced-salt vegetable or chicken stock, plus extra if needed
  • 1 tsp dried Italian herbs
  • 80g baby spinach
  • 1 tbsp tomato purée
  • Freshly ground black pepper
  • 1 tbsp lemon juice, optional

To serve

  • Fresh parsley or basil, optional
  • 20g finely grated Parmesan or vegetarian hard cheese, optional

How to Make Air Fryer Turkey Meatballs

1. Prepare the courgette

Grate the courgette using the coarse side of a box grater.

Place it in a clean tea towel or several layers of kitchen paper and gently squeeze out excess moisture. This helps prevent the meatball mixture from becoming too wet.

2. Make the meatball mixture

Place the turkey mince in a large mixing bowl.

Add the grated courgette, egg, ground oats or breadcrumbs, garlic, oregano, smoked paprika, onion granules, parsley, black pepper and salt, if using.

Mix gently until combined. Avoid overworking the mince, as this can make the meatballs dense.

3. Shape the meatballs

Divide the mixture into approximately 16 equal portions.

With slightly damp hands, roll each portion into a ball and place on a clean plate.

If the mixture feels very soft, refrigerate it for 10–15 minutes before cooking.

4. Air fry the turkey meatballs

Preheat the air fryer to 190°C, if your model requires preheating.

Lightly spray the basket with olive oil and arrange the meatballs in a single layer, leaving space between them. Cook in batches if necessary.

Air fry for approximately 12–16 minutes, carefully turning halfway through, until lightly golden and fully cooked.

Check the centre of the largest meatballs with a food thermometer. They should reach 75°C. Cooking times vary depending on their size and your air fryer model.

5. Start the tomato orzo

While the meatballs cook, heat the olive oil in a large non-stick saucepan over a medium heat.

Add the onion and red pepper. Cook for 4–5 minutes, stirring occasionally, until beginning to soften.

Add the garlic and cook for another 30 seconds.

6. Add the tomatoes and orzo

Stir in the tomato purée, chopped tomatoes, stock, dried Italian herbs and black pepper.

Bring to a gentle simmer, then add the dried orzo.

Cook according to the packet instructions, usually approximately 10–12 minutes, stirring frequently so the pasta does not stick to the bottom of the pan.

Add a little extra hot stock or water if the mixture becomes too thick before the orzo is tender.

7. Add the spinach

Once the orzo is cooked, stir in the baby spinach and allow it to wilt for 1–2 minutes.

Add the lemon juice if using, then taste and adjust the seasoning.

The finished orzo should be creamy and spoonable rather than dry.

8. Assemble and serve

Divide the tomato and spinach orzo between four shallow bowls.

Add four turkey meatballs to each portion and finish with chopped parsley or basil.

Sprinkle with a little Parmesan or vegetarian hard cheese, if using, and serve immediately.

Tips for the Best Air Fryer Turkey Meatballs

Squeeze the courgette well. Too much moisture can make the meatballs difficult to shape.

Use finely ground oats. They help bind the mixture without making it heavy.

Avoid overmixing. Combine the ingredients gently for a tender texture.

Make similar-sized meatballs. This helps them cook evenly.

Check the internal temperature. Turkey mince must be cooked thoroughly; do not rely on colour alone.

Stir the orzo regularly. Its starch can cause it to stick as it cooks.

Easy Budget-Friendly Variations

Chicken and Courgette Meatballs

Replace the turkey mince with lean chicken mince if it is more affordable or easier to find.

Hidden Vegetable Meatballs

Add a small amount of finely grated carrot to the mixture, squeezing out excess moisture if needed.

Extra Vegetable Orzo

Stir chopped mushrooms, frozen peas or leftover cooked vegetables into the tomato sauce.

Spicy Tomato Orzo

Add a pinch of chilli flakes with the dried Italian herbs.

Different Pasta

Use another small pasta shape if orzo is unavailable. Adjust the cooking time and liquid according to the packet instructions.

Can You Make Turkey Meatballs Ahead?

Yes. The meatballs can be shaped in advance, covered and refrigerated until ready to cook.

You can also cook the meatballs ahead and store them separately from the orzo. This makes it easier to reheat each component without overcooking the pasta.

For the best texture, prepare the orzo fresh when possible.

How to Store and Reheat

Allow the cooked meatballs and orzo to cool promptly, then refrigerate them in separate airtight containers at 5°C or below for up to 2 days.

Reheat the meatballs in the air fryer at 170°C for approximately 4–6 minutes, or until piping hot throughout.

Reheat the orzo in a saucepan or microwave with a splash of water or stock, stirring until thoroughly heated. Reheat leftovers only once.

Cooked meatballs can be frozen in an airtight freezer-safe container. Defrost thoroughly in the fridge before reheating.

Frequently Asked Questions

Can I use chicken mince instead of turkey?

Yes. Lean chicken mince works well in this recipe. Check that the meatballs are fully cooked and reach a core temperature of 75°C.

Why are my turkey meatballs too soft?

The courgette may contain too much moisture. Squeeze it thoroughly before mixing, and allow the oats to absorb some liquid before shaping.

Can I cook the meatballs without an egg?

The egg helps bind this mixture. An egg-free version may need additional breadcrumbs or another suitable binder, and its texture will differ.

Do I need to turn the meatballs in the air fryer?

Turning them halfway through helps them brown more evenly. Use tongs and handle them gently.

Can I cook the orzo in the air fryer?

This recipe uses the hob for the orzo because it needs to simmer in liquid and be stirred regularly. The air fryer is used for the meatballs.

What can I serve instead of orzo?

Brown rice, couscous or a simple green salad can be served alongside the meatballs.

More Easy Air Fryer Recipes

For another family-friendly chicken meal, try our Air Fryer Chicken, Broccoli & Cheddar Pockets.

You might also enjoy our Air Fryer Loaded Taco Smashed Potatoes or Air Fryer Chicken Shawarma & Crispy Chickpea Bowls for more colourful dinner inspiration.

Explore our Budget Family Meals UK guide for additional affordable meal ideas.

A Comforting Family Dinner

These air fryer turkey and courgette meatballs are a simple way to bring lean protein and vegetables together in a comforting homemade meal. Served over tomato and spinach orzo, they make a practical dinner that the whole family can enjoy.

Air Fryer Sticky Chilli Tofu & Edamame Bowls

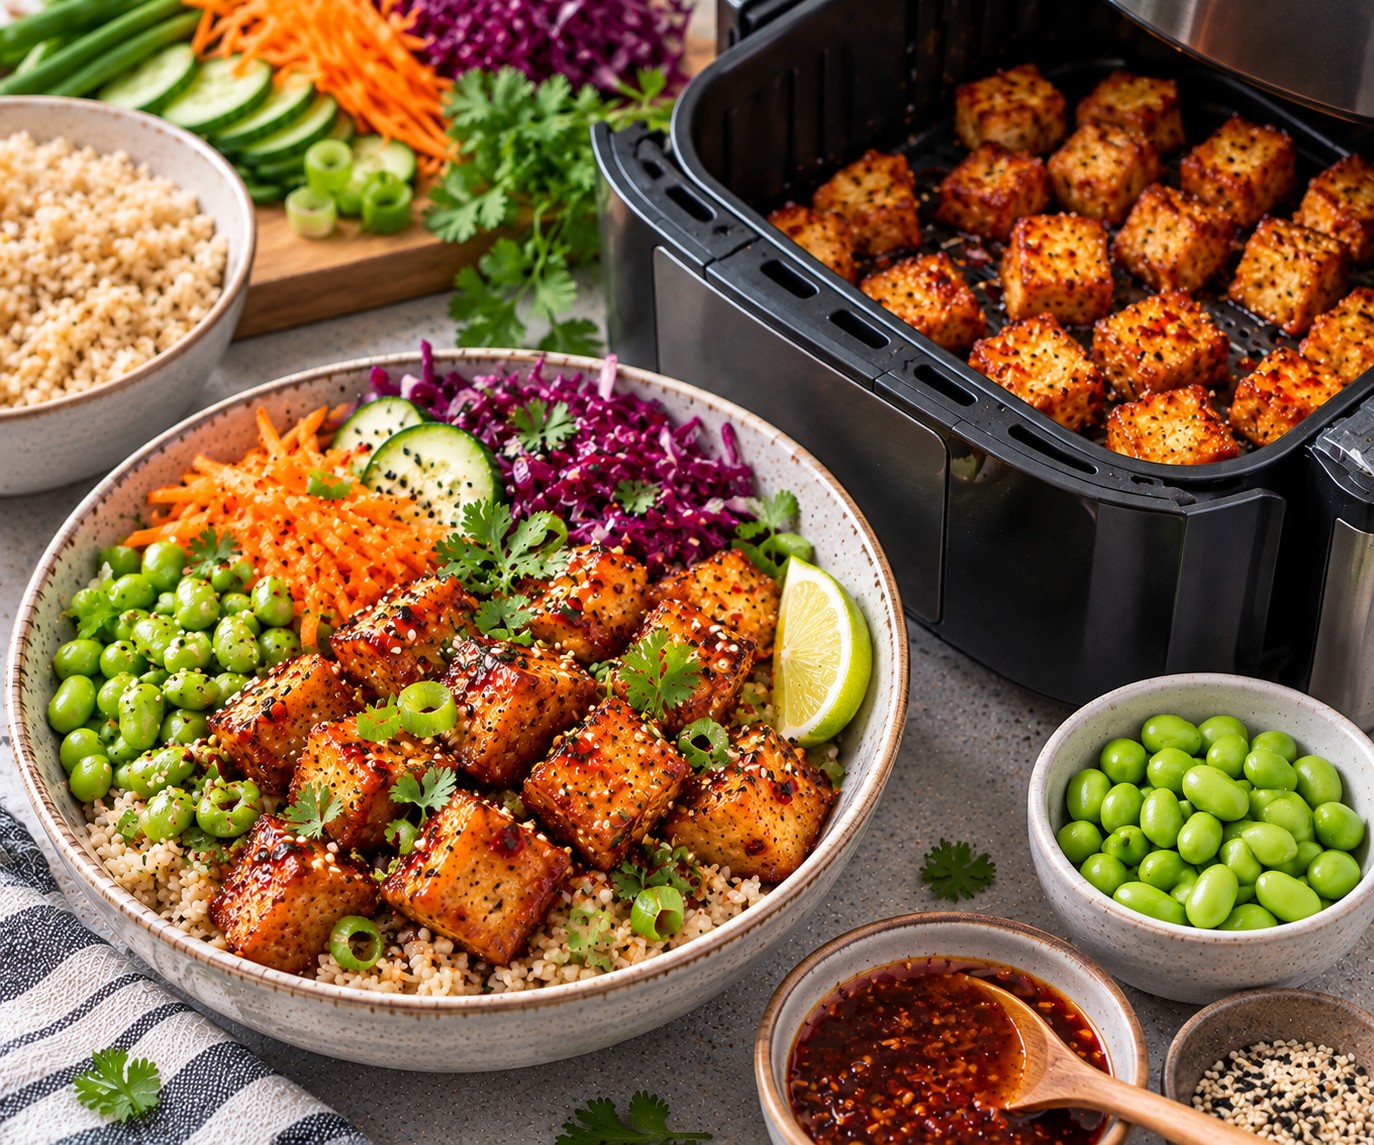
Sticky chilli air fryer tofu with edamame, brown rice, carrot, cucumber and red cabbage

These air fryer crispy tofu bowls combine golden tofu, tender edamame beans, crunchy vegetables and brown rice with a homemade sticky chilli sauce. Inspired by popular Asian-style rice bowls, they deliver plenty of flavour using straightforward ingredients from UK supermarkets.

The tofu is lightly coated in cornflour before air frying, helping it develop crisp edges without deep-frying. A simple sauce made with soy sauce, honey, garlic and chilli brings everything together.

This colourful meat-free meal is ideal for a weekday dinner and can be adapted to use whichever vegetables you already have in the fridge.

Recipe Details

  • Servings: 4
  • Preparation time: 15 minutes
  • Cooking time: 25–30 minutes
  • Total time: Approximately 45 minutes
  • Cooking method: Air fryer and hob
  • Difficulty: Easy

Ingredients

Crispy tofu

  • 2 x 200g packs firm tofu, drained
  • 2 tbsp cornflour
  • 1 tsp olive oil
  • ½ tsp garlic granules
  • ½ tsp smoked paprika
  • Freshly ground black pepper

Sticky chilli sauce

  • 3 tbsp reduced-salt soy sauce
  • 1 tbsp honey, or maple syrup for a vegan version
  • 1 tbsp lime juice
  • 1 tbsp tomato purée
  • 2 garlic cloves, crushed
  • 1 tsp finely grated fresh ginger
  • ½ tsp chilli flakes, or to taste
  • 3 tbsp water
  • 1 tsp cornflour mixed with 1 tbsp cold water

Rice bowls

  • 150g dry brown rice
  • 200g frozen shelled edamame beans
  • 1 medium carrot, grated
  • ½ cucumber, thinly sliced
  • ½ red cabbage, finely shredded (approximately 200g)
  • 2 spring onions, finely sliced
  • Lime wedges, to serve

Optional garnish

  • 1 tsp sesame seeds
  • Fresh coriander

How to Make Air Fryer Crispy Tofu Bowls

1. Prepare the tofu

Drain the tofu and gently press it between layers of kitchen paper or a clean tea towel to remove excess moisture.

Cut into even, bite-sized cubes and place in a mixing bowl.

Add the cornflour, olive oil, garlic granules, smoked paprika and black pepper. Toss gently until the tofu is evenly coated.

2. Cook the brown rice

Rinse the brown rice and cook according to the packet instructions until tender.

Drain if necessary, cover and keep warm while preparing the remaining ingredients.

3. Air fry the tofu

Preheat the air fryer to 190°C, if required by your model.

Arrange the tofu cubes in a single layer, leaving space between them. Cook in batches if necessary.

Air fry for 12–16 minutes, shaking the basket or turning the cubes halfway through, until golden with lightly crisp edges.

The exact cooking time will depend on the tofu brand, moisture content and air fryer model.

4. Cook the edamame

While the tofu cooks, prepare the frozen shelled edamame according to the packet instructions.

Drain thoroughly and set aside. Do not serve frozen edamame without cooking it as directed on the packaging.

5. Make the sticky chilli sauce

In a small saucepan, combine the soy sauce, honey, lime juice, tomato purée, garlic, ginger, chilli flakes and water.

Bring to a gentle simmer over a low heat.

Stir the cornflour and cold water together, then pour the mixture into the saucepan while stirring.

Cook for approximately 1–2 minutes until the sauce thickens enough to lightly coat the back of a spoon.

6. Coat the crispy tofu

Transfer the cooked tofu to a clean bowl.

Add the warm sticky chilli sauce a little at a time and toss gently until the cubes are evenly coated.

For the crispest texture, coat the tofu immediately before serving rather than leaving it to sit in the sauce.

7. Prepare the vegetables

Grate the carrot, slice the cucumber and finely shred the red cabbage.

Divide the cooked brown rice between four serving bowls. Arrange the edamame, carrot, cucumber and cabbage around the rice.

8. Assemble the bowls

Add the sticky chilli tofu to each bowl and scatter over the sliced spring onions.

Finish with sesame seeds and fresh coriander, if using. Serve with lime wedges.

Tips for the Best Air Fryer Crispy Tofu

Choose firm tofu. Silken tofu is too delicate for this method and will not hold its shape as well.

Remove excess moisture. Pressing the tofu helps the cornflour coating adhere and encourages browning.

Do not overcrowd the basket. Leave space between the cubes so the hot air can circulate.

Use a light cornflour coating. Too much can leave a powdery surface.

Add the sauce at the end. This helps preserve the tofu’s crisp edges.

Adjust the chilli gradually. Start with a small amount and serve extra chilli separately if preferred.

Easy Budget-Friendly Variations

Tofu and Green Pea Bowls

Replace some or all of the edamame with frozen garden peas if they are more affordable locally. The protein content will differ, but the bowls will still be colourful and satisfying.

Extra Vegetable Bowls

Add thinly sliced peppers, grated courgette or leftover cooked broccoli.

Peanut-Lime Sauce

For a different flavour, stir a teaspoon of smooth peanut butter into the sauce. Check for peanut allergies before serving.

Swap the Rice

Use wholewheat noodles or bulgur wheat instead of brown rice, following the packet instructions.

Make It Vegan

Use maple syrup instead of honey and check that your chosen sauces are suitable for a vegan diet.

Can You Make Sticky Chilli Tofu Bowls Ahead?

Yes. Prepare the tofu, vegetables and sauce separately, then assemble the bowls when ready to eat.

For the best texture, keep the sticky sauce separate until serving.

If preparing rice ahead, cool it quickly and refrigerate it promptly. Follow the storage guidance below rather than leaving cooked rice at room temperature.

How to Store and Reheat

Allow the tofu and other cooked components to cool promptly, then store them in separate airtight containers in the fridge at 5°C or below.

Refrigerate cooked rice as quickly as possible, ideally within one hour, and eat it within 24 hours. Reheat rice only once, until steaming hot throughout.

Store the tofu and sauce separately for up to 2 days. Reheat the tofu in the air fryer at 170°C for approximately 4–6 minutes, until piping hot, then toss with reheated sauce.

Keep the fresh vegetables refrigerated and add them after reheating.

Freezing the tofu is possible, but its texture may become firmer and more porous after thawing.

Frequently Asked Questions

What type of tofu works best in the air fryer?

Firm or extra-firm tofu works best because it holds its shape and contains less moisture than silken tofu.

Can I make crispy tofu without cornflour?

Yes. The tofu will still brown in the air fryer, although the surface may be less crisp.

Is edamame the same as green peas?

No. Edamame are immature soybeans, while garden peas are a different legume. They have different nutritional profiles, although peas can be a practical substitute in this recipe.

Can I make the sticky chilli sauce less spicy?

Yes. Leave out the chilli flakes or add them gradually to suit your preference.

Can I use microwave brown rice?

Yes. Prepare it according to the packet instructions and follow the manufacturer’s storage and reheating guidance.

Is this recipe suitable for vegans?

It can be made vegan by replacing the honey with maple syrup and checking that all packaged ingredients are suitable.

More Easy Air Fryer Recipes

If you enjoy colourful homemade meals, try our Air Fryer Chicken Shawarma & Crispy Chickpea Bowls for another easy rice-bowl idea.

For a meat-free option, our Air Fryer Red Lentil, Carrot & Feta Fritters are lovely served with a refreshing yoghurt dip.

You can also explore our Healthy High-Protein & Fibre-Rich Recipes collection for more everyday meal inspiration.

A Colourful Meat-Free Dinner

These air fryer sticky chilli tofu and edamame bowls combine crisp tofu, a tangy homemade sauce, fresh vegetables and brown rice in one inviting meal. They are easy to customise and offer a practical way to enjoy more plant-based ingredients throughout the week.

Allergen note: Contains soya. May also contain sesame if used as a garnish. Check the labels of your tofu, soy sauce and other packaged ingredients.

Air Fryer Chicken, Broccoli & Cheddar Pockets

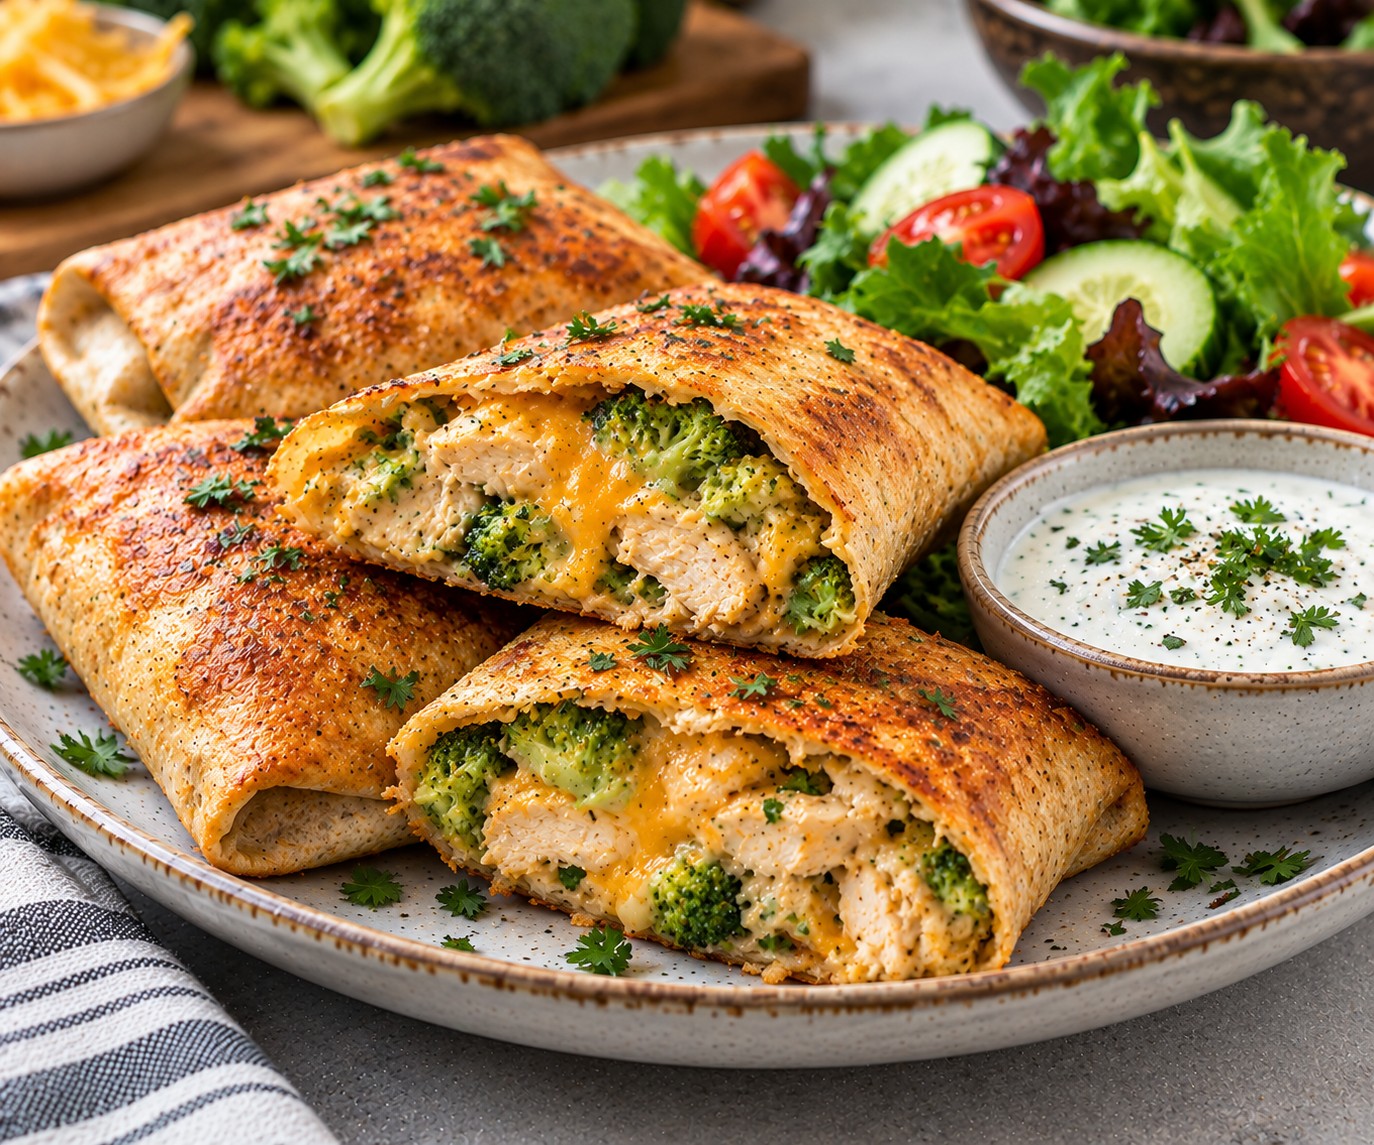
Golden air fryer tortilla pockets filled with chicken, broccoli and melted Cheddar, served with fresh salad

These air fryer chicken pockets are filled with tender chicken, finely chopped broccoli and melted Cheddar, all wrapped in a golden wholemeal tortilla. They are a simple homemade alternative to shop-bought savoury pastries and make an easy lunch or family dinner.

Using leftover cooked chicken keeps preparation quick, while broccoli adds colour and texture. Serve the pockets warm with a crunchy salad or vegetable sticks for a convenient everyday meal.

Recipe Details

  • Servings: 4
  • Preparation time: 15 minutes
  • Cooking time: 8–12 minutes, plus extra time if cooking in batches
  • Total time: Approximately 25–30 minutes
  • Cooking method: Air fryer
  • Difficulty: Easy

Ingredients

For the chicken pockets

  • 4 medium wholemeal tortilla wraps, approximately 20cm wide
  • 300g cooked, skinless chicken breast, finely shredded or chopped
  • 200g broccoli, cut into small florets
  • 60g mature Cheddar, grated
  • 60g thick natural Greek yoghurt
  • 1 tsp Dijon mustard, optional
  • ½ tsp garlic granules
  • ¼ tsp smoked paprika
  • Freshly ground black pepper
  • A little olive oil spray

To serve

  • Mixed salad leaves
  • ½ cucumber, sliced
  • 2 medium tomatoes, chopped
  • Lemon wedges, optional

How to Make Air Fryer Chicken Pockets

1. Prepare the broccoli

Steam or boil the broccoli for approximately 3–4 minutes, until just tender.

Drain thoroughly, leave to cool slightly and chop into small pieces. Pat dry if necessary to remove excess moisture.

2. Make the chicken filling

Place the cooked chicken and chopped broccoli in a mixing bowl.

Add the grated Cheddar, Greek yoghurt, Dijon mustard (if using), garlic granules, smoked paprika and black pepper.

Stir until the ingredients are evenly combined. The mixture should be creamy enough to hold together without being runny.

3. Fill the tortillas

Lay a tortilla on a clean work surface.

Spoon one-quarter of the filling into the centre, leaving enough space around the edges to fold it securely.

Fold the left and right sides inwards, then fold the bottom edge over the filling and roll tightly to form a rectangular pocket.

Repeat with the remaining tortillas and filling.

4. Prepare the air fryer

Preheat the air fryer to 180°C, if your model requires preheating.

Lightly spray the outside of each tortilla pocket with olive oil. This helps the wraps develop a golden, lightly crisp surface.

5. Air fry until golden

Arrange the pockets in the basket with the folded seams facing down. Leave a little space between them and cook in batches if necessary.

Air fry at 180°C for 8–12 minutes, carefully turning halfway through if needed, until the tortillas are golden and the filling is piping hot throughout.

Check from 8 minutes onwards, as thinner wraps may brown more quickly.

6. Rest and serve

Leave the pockets to stand for 2 minutes before cutting them in half.

Serve warm with mixed salad leaves, cucumber, tomatoes and lemon wedges, if using.

Tips for the Best Air Fryer Chicken Pockets

Use cooked chicken. The short air-frying time is intended to crisp the wraps and heat the filling, not cook raw chicken safely.

Drain the broccoli well. Excess moisture can make the tortillas soggy.

Chop the filling finely. Smaller pieces make the pockets easier to fold and help the filling heat evenly.

Avoid overfilling. Leave enough tortilla around the edges to create a secure seal.

Place the seam underneath. This helps the pockets stay closed during cooking.

Check your air fryer. Cooking times vary depending on the appliance, tortilla thickness and size of the pockets.

Easy Budget-Friendly Variations

Turkey and Broccoli Pockets

Replace the chicken with leftover cooked turkey for another practical family lunch.

Chicken and Sweetcorn Pockets

Swap half the broccoli for well-drained sweetcorn. This gives the filling a slightly sweeter flavour.

Spinach and Cheddar Pockets

Replace the broccoli with wilted spinach. Squeeze out any excess liquid before adding it to the filling.

A Little Extra Heat

Add a pinch of chilli flakes or a small amount of hot sauce to the filling.

Use Leftover Vegetables

Finely chopped cooked cauliflower, carrots or peas can be used instead of some of the broccoli.

Can You Make Chicken Pockets Ahead?

Yes. You can prepare the filling in advance and keep it covered in the fridge. Assemble the pockets shortly before cooking to prevent the tortillas from becoming soft.

If using leftover chicken, remember that preparing a new dish does not restart its storage life. Use the chicken within its original safe storage period.

How to Store and Reheat

Allow cooked pockets to cool promptly, then refrigerate in an airtight container at 5°C or below.

If made with freshly cooked chicken, enjoy within 2 days. If using leftover chicken, follow the original chicken’s storage period instead.

Reheat in the air fryer at 160°C for approximately 4–6 minutes, checking that the centre is piping hot throughout. Reheat only once.

Store salad separately and add it fresh when serving.

Freezing is possible, although the yoghurt-based filling may release some moisture after thawing. Defrost thoroughly in the fridge before reheating.

Frequently Asked Questions

Can I use raw chicken in these air fryer pockets?

No. Use chicken that has already been thoroughly cooked. The pockets cook too quickly to reliably cook raw chicken inside the tortilla.

Can I use frozen broccoli?

Yes. Cook it according to the packet instructions, then drain and dry it thoroughly before chopping.

How do I stop the pockets from opening?

Avoid overfilling, fold the sides in tightly and place the seam underneath in the air fryer basket.

Can I use regular tortilla wraps?

Yes. White flour tortillas work as well, although the texture and fibre content will differ.

Why are my chicken pockets soggy?

The broccoli may have retained too much water, or the filling may contain too much yoghurt. Drain the vegetables thoroughly and use thick yoghurt.

Can I make these without Cheddar?

You can use another cheese that melts well, such as mozzarella. The flavour and texture will be slightly different.

More Easy Air Fryer Recipes

For another quick lunch, try our Air Fryer Cottage Cheese Pizza Flatbreads.

If you prefer a chicken dinner with plenty of colourful vegetables, explore our Air Fryer Chicken Shawarma & Crispy Chickpea Bowls or Air Fryer Buffalo Chicken & Cauliflower Bites.

You can also browse our Budget Family Meals UK guide for more affordable everyday cooking inspiration.

A Simple Homemade Lunch or Dinner

These air fryer chicken, broccoli and Cheddar pockets are a convenient way to turn familiar ingredients into a warm, satisfying meal. With their crisp tortilla shells and creamy savoury filling, they are especially useful when you have cooked chicken to use up.

Air Fryer Red Lentil, Carrot & Feta Fritters

Crispy air fryer smashed potatoes topped with taco beef, kidney beans, salad and lime yoghurt sauce

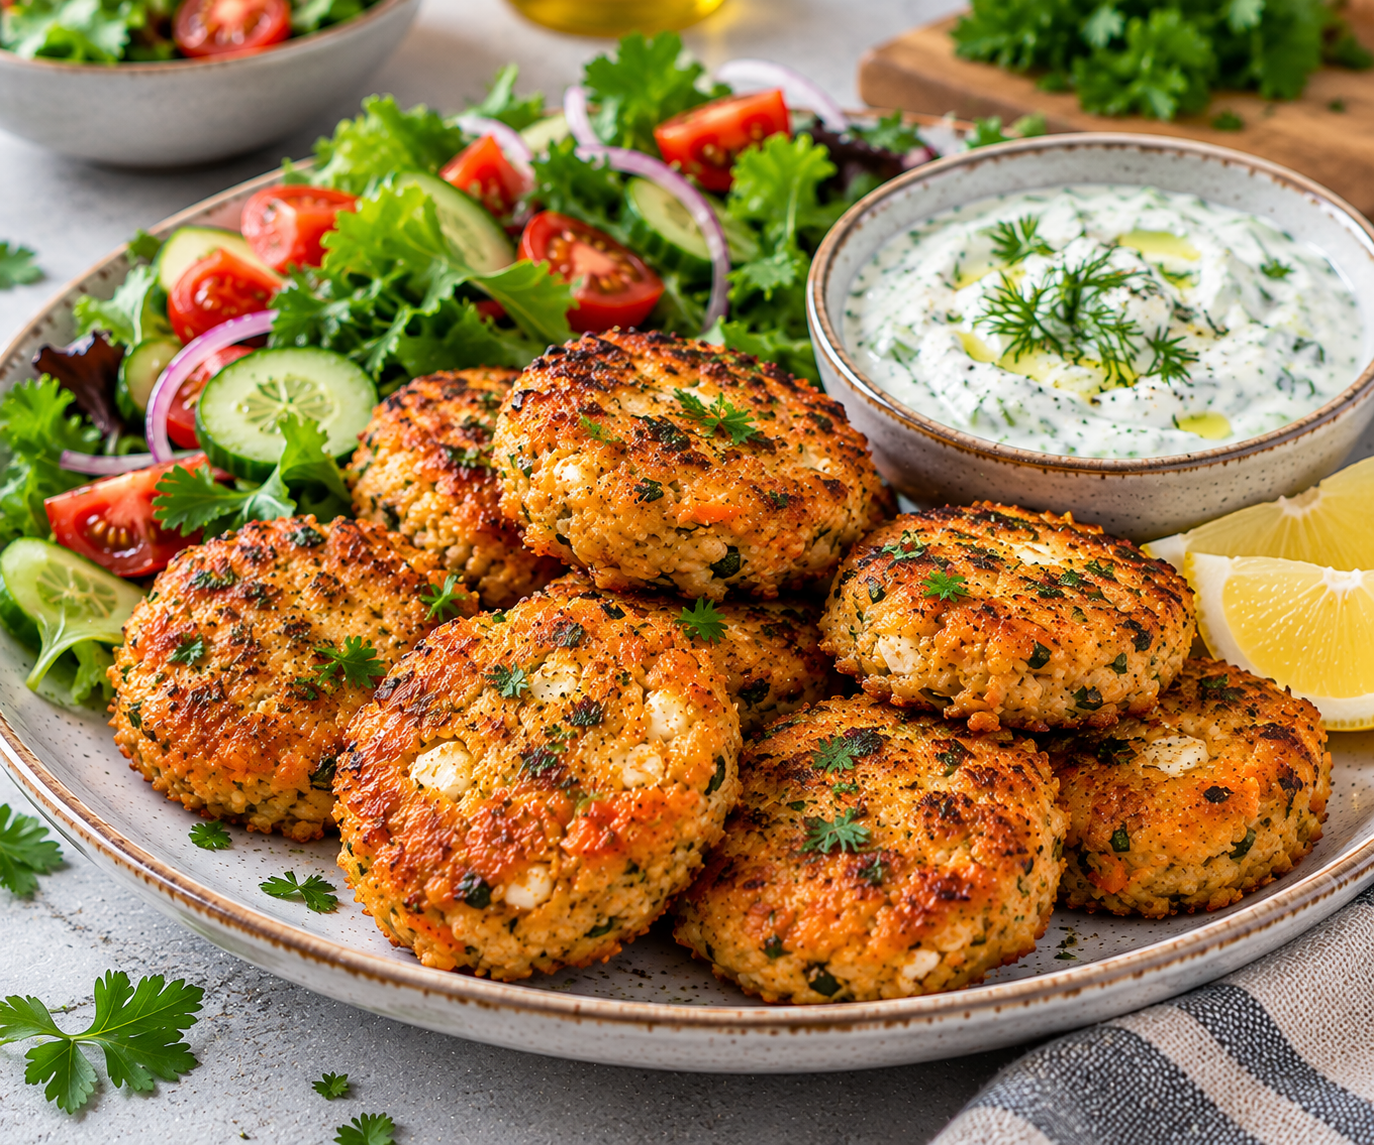
These air fryer lentil fritters are golden on the outside, tender in the middle and packed with simple, affordable ingredients. Made with red lentils, grated carrot, crumbled feta and fragrant herbs, they are a delicious meat-free option for lunch or dinner.

Serve them with a refreshing homemade cucumber yoghurt dip and a crunchy salad. They are also ideal for preparing ahead, making them a practical addition to your weekly meal plan.

Recipe Details

  • Servings: 4
  • Yield: Approximately 12 small fritters
  • Preparation time: 15 minutes
  • Lentil cooking time: 10–12 minutes
  • Chilling time: 15 minutes
  • Air fryer cooking time: 12–16 minutes per batch
  • Total time: Approximately 55–65 minutes, depending on batch size
  • Cooking method: Hob and air fryer

Ingredients

For the lentil fritters

  • 150g dried red split lentils
  • 1 medium carrot, finely grated (approximately 100g)
  • 80g reduced-fat feta, crumbled
  • 1 medium egg
  • 35g porridge oats
  • 2 spring onions, finely chopped
  • 1 garlic clove, crushed
  • 1 tsp ground cumin
  • ½ tsp smoked paprika
  • 1 tbsp finely chopped fresh parsley
  • 1 tsp lemon zest
  • Freshly ground black pepper
  • Olive oil spray, for cooking

For the cucumber yoghurt dip

  • 150g fat-free natural Greek yoghurt
  • ¼ cucumber, finely grated
  • 1 small garlic clove, finely grated
  • 1 tsp lemon juice
  • 1 tsp chopped fresh dill or mint, optional
  • Freshly ground black pepper

To serve

  • Mixed salad leaves
  • Cherry tomatoes
  • Lemon wedges
  • Wholemeal pitta bread, optional

How to Make Air Fryer Lentil Fritters

1. Cook the red lentils

Rinse the red lentils thoroughly under cold running water.

Place them in a saucepan and cover with plenty of fresh water. Bring to the boil, then reduce the heat and simmer for approximately 10–12 minutes, until tender.

Drain very thoroughly in a fine sieve and leave to cool for 5 minutes. Press gently with the back of a spoon to remove excess water.

The lentils should be soft but not watery.

2. Prepare the vegetables

Grate the carrot finely, then gently squeeze out any excess moisture using clean kitchen paper or a tea towel.

Finely chop the spring onions and parsley, and crush the garlic.

3. Mix the fritter ingredients

Place the drained lentils in a large mixing bowl and mash lightly with a fork.

Add the grated carrot, crumbled feta, egg, oats, spring onions, garlic, cumin, smoked paprika, parsley, lemon zest and black pepper.

Mix until everything is evenly combined.

4. Rest the mixture

Leave the mixture to stand for 5 minutes so the oats can absorb some of the moisture.

If it is still too soft to shape, add another tablespoon of oats.

Divide into 12 equal portions and form small, slightly flattened fritters, approximately 1.5cm thick.

Place on a plate and refrigerate for 15 minutes to help them firm up.

5. Preheat the air fryer

Preheat the air fryer to 190°C, if your model requires preheating.

Lightly spray the basket or an air-fryer-safe perforated liner with olive oil.

6. Cook the fritters

Arrange the fritters in a single layer, leaving a little space between them.

Lightly spray the tops with olive oil.

Air fry at 190°C for 12–16 minutes, carefully turning halfway through, until golden on both sides and firm in the centre.

Cook in batches if necessary. Cooking times vary depending on your air fryer and the thickness of the fritters.

7. Prepare the cucumber yoghurt dip

Grate the cucumber and squeeze out as much excess moisture as possible.

Mix with the Greek yoghurt, garlic, lemon juice, dill or mint, and black pepper.

Cover and refrigerate until ready to serve.

8. Serve

Divide the fritters between four plates, allowing approximately three per person.

Serve with the cucumber yoghurt dip, mixed salad leaves, cherry tomatoes and lemon wedges.

Add a warm wholemeal pitta if you would like a more substantial meal.

Tips for the Best Air Fryer Lentil Fritters

Drain the lentils thoroughly. Excess water is the main reason lentil fritters can become too soft.

Squeeze the grated carrot. This prevents additional moisture from loosening the mixture.

Let the oats absorb the liquid. Resting the mixture helps the fritters hold together.

Chill before cooking. A short spell in the fridge makes the patties easier to handle.

Turn gently. Wait until the underside has firmed up before flipping with a thin spatula.

Avoid overcrowding. Cook in batches so the hot air can circulate evenly.

Easy Budget-Friendly Variations

Spinach and Feta Fritters

Replace half the grated carrot with finely chopped cooked spinach. Squeeze out all excess moisture before adding it.

Mildly Spiced Lentil Fritters

Leave out the smoked paprika and add a little dried oregano for a gentler flavour.

Extra Vegetable Fritters

Add a small amount of finely grated courgette, making sure to squeeze out the moisture first.

Different Cheese

A small amount of grated mature Cheddar can replace the feta, although the flavour and texture will change.

Make Them Dairy-Free

Omit the feta and use a suitable dairy-free yoghurt alternative for the dip. The fritter mixture may need a little extra seasoning.

Can You Make Lentil Fritters Ahead?

Yes. Prepare and shape the fritters in advance, then keep them covered in the fridge until ready to cook.

For best results, cook them within 24 hours of preparing the mixture.

You can also cook the fritters ahead and reheat them shortly before serving.

How to Store and Reheat

Allow cooked fritters to cool promptly, then refrigerate in an airtight container at 5°C or below for up to 2 days.

Reheat in the air fryer at 170°C for approximately 4–6 minutes, or until piping hot throughout. Reheat only once.

The cooked fritters can be frozen. Arrange them in a single layer until frozen, then transfer to a freezer-safe container. Defrost thoroughly in the fridge before reheating.

Store the cucumber yoghurt dip separately in the fridge and use within 2 days.

Frequently Asked Questions

Can I use tinned lentils instead of dried red lentils?

You can use well-drained cooked lentils, but the texture will differ. Red split lentils soften more readily and help bind the fritter mixture.

Why are my lentil fritters falling apart?

The lentils or vegetables may contain too much moisture. Drain them thoroughly, allow the oats to absorb the liquid and chill the shaped fritters before cooking.

Can I make these fritters without an egg?

An egg helps bind this recipe. You can experiment with a suitable egg replacement, but the texture may be more delicate and the mixture may need adjusting.

Can I cook lentil fritters in the oven?

Yes. Place them on a lightly greased baking tray and bake at 200°C/180°C fan for approximately 20–25 minutes, turning halfway through, until golden and cooked through.

What can I serve with lentil fritters?

They pair well with cucumber yoghurt dip, a fresh salad, roasted vegetables or wholemeal pitta bread.

More Easy Air Fryer Recipes

If you enjoy simple homemade meals, try our Air Fryer Tuna & White Bean Patties for another affordable store-cupboard recipe.

For a colourful dinner, explore our Air Fryer Chicken Shawarma & Crispy Chickpea Bowls or browse our Healthy High-Protein & Fibre-Rich Recipes collection for more everyday meal ideas.

A Simple Meat-Free Air Fryer Meal

These red lentil, carrot and feta fritters are a convenient way to turn inexpensive ingredients into a flavourful homemade dish. With their golden edges and refreshing cucumber yoghurt dip, they make a lovely lunch or easy family dinner.

Air Fryer Loaded Taco Smashed Potatoes

Crispy air fryer smashed potatoes topped with taco beef, kidney beans, salad and lime yoghurt sauce

These air fryer smashed potatoes are golden and crisp around the edges, then topped with smoky taco-spiced beef, red kidney beans, fresh tomatoes and a cooling lime yoghurt sauce.

Inspired by loaded fries and crispy smashed potatoes, this homemade version uses affordable supermarket ingredients to create a colourful, satisfying family meal. Keeping the potato skins on adds texture, while the beef and beans make the topping more substantial.

Serve with shredded lettuce and a little grated Cheddar for an easy takeaway-inspired dinner.

Recipe Details

  • Servings: 4
  • Preparation time: 15 minutes
  • Boiling time: 15–20 minutes
  • Air fryer cooking time: 18–25 minutes, depending on batch size
  • Topping cooking time: 12–15 minutes
  • Total time: Approximately 55–65 minutes
  • Cooking method: Hob and air fryer

Ingredients

Smashed potatoes

  • 750g baby potatoes, washed
  • 2 tsp olive oil
  • ½ tsp smoked paprika
  • ½ tsp garlic granules
  • Freshly ground black pepper
  • A small pinch of salt, optional

Taco beef and bean topping

  • 300g lean beef mince, preferably 5% fat
  • 1 small onion, finely chopped
  • 1 red pepper, diced
  • 2 garlic cloves, crushed
  • 1 x 400g tin red kidney beans, drained and rinsed
  • 200g chopped tinned tomatoes
  • 1 tsp ground cumin
  • 1 tsp smoked paprika
  • ½ tsp ground coriander
  • ½ tsp dried oregano
  • ¼ tsp chilli powder, optional
  • 2 tbsp water, if needed
  • Freshly ground black pepper

Lime yoghurt sauce

  • 150g fat-free natural Greek yoghurt
  • 1 tbsp lime juice
  • ½ tsp garlic granules
  • 1–2 tbsp cold water, to loosen
  • Freshly ground black pepper

To serve

  • 40g mature Cheddar, grated
  • 1 small tomato, diced
  • A handful of shredded lettuce
  • 2 spring onions, finely sliced
  • Lime wedges, optional

How to Make Air Fryer Loaded Taco Smashed Potatoes

1. Boil the potatoes

Place the baby potatoes in a saucepan and cover with cold water.

Bring to the boil, then simmer for approximately 15–20 minutes, until tender enough to pierce easily with a fork.

Drain thoroughly and leave to steam-dry for 3–5 minutes. This helps the potatoes become crisp in the air fryer.

2. Smash and season

Place the potatoes on a clean board or tray. Gently press each one with the base of a glass or potato masher until flattened to approximately 1–1.5cm thick.

Take care not to break them completely apart.

Brush or drizzle with olive oil, then sprinkle over the smoked paprika, garlic granules, black pepper and salt, if using.

3. Air fry the potatoes

Preheat the air fryer to 200°C, if required by your model.

Arrange the potatoes in a single layer, leaving a little space between them. Cook in batches if necessary.

Air fry for 18–25 minutes, checking after 15 minutes, until the edges are golden and crisp. Turn carefully if needed, although delicate potatoes may be best left undisturbed until the underside firms up.

4. Prepare the taco topping

While the potatoes cook, place a large non-stick frying pan over a medium heat.

Add the lean beef mince and onion. Cook for approximately 5–6 minutes, breaking up the mince with a wooden spoon, until the beef begins to brown.

If necessary, drain away any excess fat.

5. Add the vegetables and spices

Stir in the red pepper and garlic. Cook for another 2 minutes.

Add the cumin, smoked paprika, coriander, oregano, chilli powder and black pepper. Stir for 30 seconds to release the aromas.

6. Add the beans and tomatoes

Stir in the drained kidney beans and chopped tomatoes.

Simmer gently for 5–7 minutes, adding a little water if the mixture becomes too thick. The beef should be completely cooked, with no pink remaining, and the topping should be hot throughout.

Taste and adjust the seasoning.

7. Make the lime yoghurt sauce

Mix the Greek yoghurt, lime juice, garlic granules and black pepper in a small bowl.

Add a little cold water until the sauce is thin enough to drizzle. Keep refrigerated until serving.

8. Assemble the loaded potatoes

Divide the crispy smashed potatoes between four plates or shallow bowls.

Spoon the hot taco beef and bean mixture over the top. Sprinkle with the grated Cheddar, allowing it to soften against the warm topping.

Finish with diced tomato, shredded lettuce, spring onions and a drizzle of lime yoghurt sauce.

Serve immediately with lime wedges, if using.

Tips for Crispy Air Fryer Smashed Potatoes

Choose similar-sized potatoes. They will boil and crisp more evenly.

Steam-dry after boiling. Removing surface moisture helps produce golden edges.

Do not flatten them too thinly. Aim for approximately 1–1.5cm so they remain fluffy inside.

Avoid overcrowding. Cook in batches to allow hot air to circulate.

Add toppings just before serving. This helps the potatoes retain their crisp texture.

Keep the taco topping fairly thick. A watery sauce can quickly soften the potatoes.

Easy Budget-Friendly Variations

Chicken Taco Potatoes

Replace the beef with lean chicken mince. Cook it thoroughly before adding the beans and tomatoes.

Vegetarian Loaded Potatoes

Leave out the beef and use an additional tin of drained kidney beans or a mixture of kidney beans and black beans. Add extra vegetables if preferred.

Mild Family-Friendly Version

Leave out the chilli powder and serve hot sauce separately so everyone can adjust their portion.

Sweet Potato Variation

Use small sweet potatoes instead of baby potatoes. Their texture and cooking time will differ, so check them regularly.

Use Leftover Vegetables

Finely diced courgette, mushrooms or carrots can be added to the taco topping to make use of ingredients already in your fridge.

Can You Make Loaded Taco Smashed Potatoes Ahead?

Yes. The taco beef and bean topping can be prepared in advance and refrigerated once cooled.

You can also boil the potatoes ahead of time. For the best texture, smash and air fry them shortly before serving.

Keep the salad and yoghurt sauce separate until you assemble the dish.

How to Store and Reheat

Allow leftovers to cool promptly, then store the potatoes and taco topping in separate airtight containers in the fridge at 5°C or below for up to 2 days.

Reheat the potatoes in the air fryer at 180°C for approximately 5–8 minutes, until piping hot and crisp again.

Reheat the beef and bean topping separately until piping hot throughout. Reheat leftovers only once.

Keep the yoghurt sauce refrigerated and add fresh lettuce and tomato after reheating.

The cooked beef and bean topping can be frozen separately. Defrost thoroughly in the fridge before reheating.

Frequently Asked Questions

Do I need to boil potatoes before air frying them?

For this recipe, yes. Boiling softens the centres so the potatoes can be flattened without breaking apart. Air frying then creates the crisp edges.

Can I use ordinary potatoes instead of baby potatoes?

Yes. Cut larger potatoes into evenly sized pieces before boiling, then smash them once tender.

How do I keep smashed potatoes crispy?

Drain and steam-dry them thoroughly, use a small amount of oil and avoid overcrowding the air fryer basket. Add the toppings immediately before serving.

Can I make the taco topping without beef?

Yes. Try a mixture of kidney beans, black beans and finely chopped vegetables for a meat-free version.

Can I use a different cheese?

Yes. A little grated reduced-fat Cheddar or mozzarella can replace mature Cheddar.

More Easy Air Fryer Recipes

For another colourful family dinner, try our Air Fryer Chicken Shawarma & Crispy Chickpea Bowls.

You might also enjoy our Air Fryer Buffalo Chicken & Cauliflower Bites with a cooling garlic yoghurt dip, or our Air Fryer Tuna & White Bean Patties for an easy store-cupboard meal.

For more everyday cooking inspiration, explore our Budget Family Meals UK guide.

A Homemade Twist on Loaded Fries

These air fryer loaded taco smashed potatoes combine crispy potato edges, smoky beef and beans, fresh vegetables and a tangy yoghurt sauce. They are easy to customise and make a satisfying family meal using simple, affordable ingredients.

Air Fryer Tuna & White Bean Patties

Golden air fryer tuna and white bean patties served with lemon yoghurt dip and fresh salad

These air fryer tuna patties are golden on the outside, tender in the middle and made with affordable store-cupboard ingredients. Tinned tuna, white beans and oats come together with lemon, herbs and simple seasonings to create an easy homemade meal.

Serve them with a refreshing lemon yoghurt dip and a colourful salad for lunch or dinner. They are also a practical way to use up leftover vegetables and make the most of everyday ingredients.

Recipe Details

  • Servings: 4 (makes 8 patties)
  • Preparation time: 15 minutes
  • Chilling time: 15 minutes
  • Cooking time: 12–16 minutes
  • Total time: Approximately 45 minutes
  • Cooking method: Air fryer

Ingredients

For the tuna and white bean patties

  • 2 x 145g tins tuna in spring water, drained thoroughly
  • 1 x 400g tin cannellini beans, drained and rinsed
  • 40g porridge oats
  • 1 medium egg
  • 2 spring onions, finely chopped
  • 1 small carrot, finely grated
  • 1 tbsp lemon juice
  • 1 tsp finely grated lemon zest
  • 1 tsp dried parsley, or 1 tbsp chopped fresh parsley
  • ½ tsp smoked paprika
  • ½ tsp garlic granules
  • Freshly ground black pepper
  • A little olive oil spray

For the lemon yoghurt dip

  • 150g fat-free natural Greek yoghurt
  • 1 tsp lemon juice
  • ½ tsp dried dill, or 1 tsp chopped fresh dill
  • Freshly ground black pepper

To serve

  • Mixed salad leaves
  • ½ cucumber, sliced
  • 2 tomatoes, chopped
  • Lemon wedges

How to Make Air Fryer Tuna Patties

1. Prepare the beans

Drain and rinse the cannellini beans, then pat them dry with kitchen paper.

Place them in a large bowl and mash with a fork until mostly smooth, leaving a few small pieces for texture.

2. Add the tuna and vegetables

Drain the tuna thoroughly and flake it into the bowl.

Add the grated carrot, spring onions, lemon juice, lemon zest, parsley, smoked paprika, garlic granules and black pepper.

Mix until evenly combined.

3. Bind the mixture

Add the egg and porridge oats, then stir until the mixture holds together.

If it feels too wet, add another tablespoon of oats. If it seems unusually dry, add a teaspoon of water or lemon juice.

Leave the mixture to stand for 5 minutes so the oats can absorb some moisture.

4. Shape the patties

Divide the mixture into eight equal portions and shape into round patties, approximately 1.5–2cm thick.

Place them on a plate and refrigerate for 15 minutes to help them firm up before cooking.

5. Preheat the air fryer

Preheat the air fryer to 190°C, if your model requires preheating.

Lightly spray the basket with olive oil. Arrange the patties in a single layer, leaving space between them. Cook in batches if necessary.

6. Air fry until golden

Air fry at 190°C for 12–16 minutes, carefully turning halfway through, until golden on both sides, firm and piping hot throughout.

The exact cooking time will depend on the thickness of the patties and your air fryer model.

7. Prepare the lemon yoghurt dip

While the patties cook, mix the Greek yoghurt, lemon juice, dill and black pepper in a small bowl.

Keep chilled until serving.

8. Serve

Divide the patties between four plates, allowing two per person.

Serve with the lemon yoghurt dip, salad leaves, cucumber, tomatoes and lemon wedges.

For a more substantial meal, add a small baked potato or a portion of brown rice.

Tips for the Best Air Fryer Tuna Patties

Drain the tuna and beans thoroughly. Excess liquid can make the mixture too soft to shape.

Mash the beans well. They help bind the patties without needing a large amount of flour or breadcrumbs.

Allow the oats to absorb moisture. Resting the mixture for a few minutes improves its consistency.

Chill before cooking. This helps the patties hold their shape when turned.

Turn carefully. Use a thin spatula and wait until the underside has firmed up before flipping.

Easy Budget-Friendly Variations

Tuna and Sweetcorn Patties

Add 2 tablespoons of well-drained sweetcorn for a little sweetness and extra texture.

Spicy Tuna Patties

Mix in a pinch of chilli flakes or a little finely chopped fresh chilli.

Mediterranean-Style Patties

Replace the smoked paprika with dried oregano and add a little chopped parsley.

Different White Beans

Butter beans can replace cannellini beans. Drain and mash them thoroughly before mixing.

Oat-Free Alternative

Use approximately 40g fine wholemeal breadcrumbs instead of oats. The texture may differ slightly.

Can You Make Tuna Patties Ahead?

Yes. Shape the patties and keep them covered in the fridge until ready to cook, ideally preparing them the same day.

You can also cook them in advance and store them separately from the salad and yoghurt dip.

How to Store and Reheat

Allow cooked patties to cool promptly, then refrigerate in an airtight container at 5°C or below for up to 2 days.

Reheat in the air fryer at 170°C for approximately 4–6 minutes, or until piping hot throughout. Reheat only once.

The cooked patties can also be frozen. Place them in a freezer-safe container with baking parchment between the layers. Defrost thoroughly in the fridge before reheating.

Keep the yoghurt dip covered in the fridge and use within 2 days.

Frequently Asked Questions

Can I use tuna in oil?

Yes. Drain it thoroughly before mixing. Tuna in spring water is used in this version, but either will work.

Why are my tuna patties falling apart?

The mixture may contain too much moisture or may need more time to rest. Drain the ingredients well, allow the oats to absorb liquid and chill the shaped patties before cooking.

Can I make tuna patties without an egg?

You can try using a suitable egg substitute, but the mixture may need adjusting to hold together. The egg helps bind this particular recipe.

Can I cook these patties in the oven?

Yes. Bake on a lightly greased tray at 200°C/180°C fan for approximately 18–22 minutes, turning halfway through, until golden and piping hot.

What can I serve with tuna patties?

A crunchy salad, lemon yoghurt dip, roasted vegetables or a baked potato all work well.

More Easy Air Fryer Recipes

For another colourful meal, try our Air Fryer Chicken Shawarma & Crispy Chickpea Bowls, or make our Air Fryer Cottage Cheese Pizza Flatbreads for a homemade pizza alternative.

You can also explore our Budget Family Meals UK guide for more affordable cooking inspiration.

An Easy Store-Cupboard Meal

These air fryer tuna and white bean patties turn a few everyday ingredients into a convenient homemade meal. With their golden edges, soft centres and fresh lemon yoghurt dip, they are ideal for a simple lunch or family dinner.

Air Fryer Buffalo Chicken & Cauliflower Bites

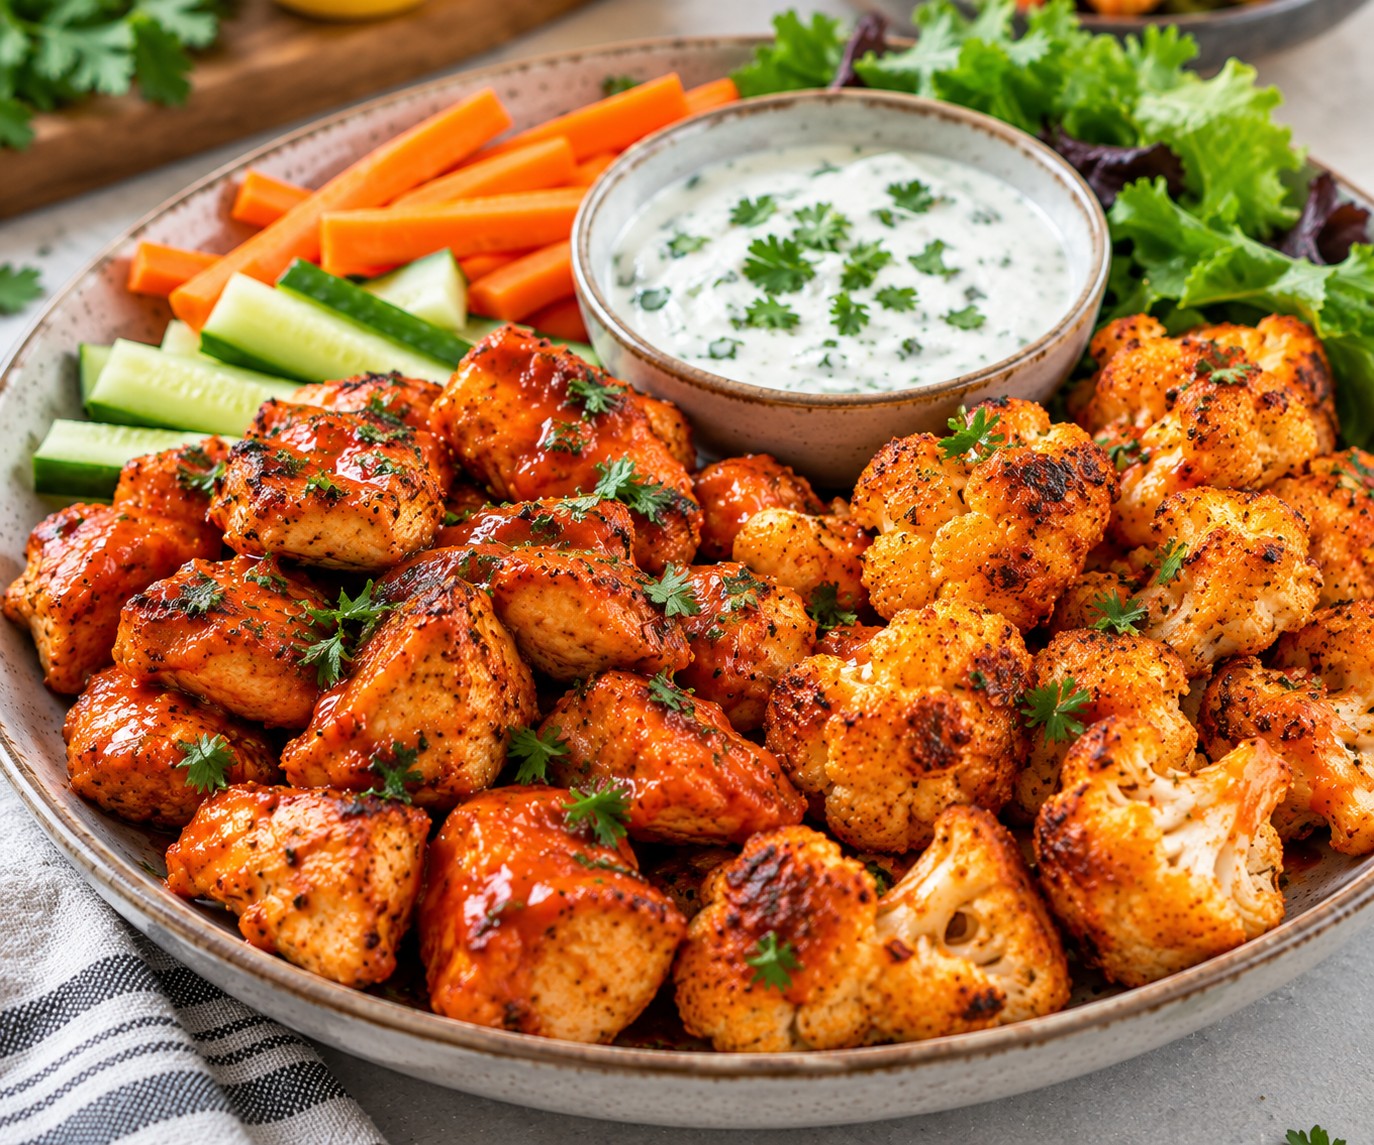
Air fryer Buffalo chicken and cauliflower bites served with garlic yoghurt dip and fresh vegetables

These air fryer Buffalo chicken bites are a delicious homemade alternative to takeaway-style chicken wings. Juicy pieces of chicken breast and golden cauliflower florets are coated in smoky seasoning, cooked in the air fryer and finished with a tangy Buffalo-inspired sauce.

Serve them with a cooling garlic yoghurt dip, crunchy carrot sticks and a fresh salad for an easy family dinner. The recipe uses simple supermarket ingredients and can be made milder or spicier to suit your taste.

Recipe Details

  • Servings: 4
  • Preparation time: 15 minutes
  • Cooking time: 22–28 minutes, plus extra time if cooking in batches
  • Total time: Approximately 40–45 minutes
  • Cooking method: Air fryer
  • Difficulty: Easy

Ingredients

Chicken and cauliflower

  • 500g skinless, boneless chicken breast, cut into even bite-sized pieces
  • 1 small cauliflower, approximately 500g trimmed weight, cut into small florets
  • 2 tbsp cornflour, divided
  • 1 tsp smoked paprika
  • 1 tsp garlic granules
  • ½ tsp onion granules
  • ½ tsp freshly ground black pepper
  • ¼ tsp salt, optional
  • 2 tsp olive oil, divided

Buffalo-inspired sauce

  • 3 tbsp cayenne pepper hot sauce
  • 1 tbsp tomato purée
  • 1 tsp honey
  • 1 tsp lemon juice
  • 1–2 tbsp warm water, as needed
  • ½ tsp smoked paprika

Garlic yoghurt dip

  • 150g fat-free natural Greek yoghurt
  • 1 small garlic clove, finely grated
  • 1 tsp lemon juice
  • 1 tbsp finely chopped fresh parsley, optional
  • Freshly ground black pepper

To serve

  • 2 carrots, cut into sticks
  • ½ cucumber, sliced
  • A handful of lettuce or mixed salad leaves
  • Lemon wedges, optional

How to Make Air Fryer Buffalo Chicken Bites

1. Prepare the chicken and cauliflower

Pat the chicken dry with kitchen paper. Place it in a bowl and add 1 tablespoon of cornflour, half the smoked paprika, half the garlic granules, half the onion granules, a little black pepper and 1 teaspoon of olive oil.

Toss until the chicken is evenly coated.

Place the cauliflower florets in a separate bowl. Add the remaining cornflour, seasonings and olive oil, then toss well.

Keep the raw chicken and vegetables separate during preparation. Wash your hands, utensils and work surfaces thoroughly after handling raw chicken.

2. Preheat the air fryer

Preheat the air fryer to 190°C, if your model requires it.

Lightly grease the basket if needed. Avoid overcrowding so the hot air can circulate around the food.

3. Cook the cauliflower

Arrange the cauliflower florets in a single layer.

Air fry at 190°C for 12–16 minutes, shaking the basket halfway through, until the edges are golden and the florets are tender.

Transfer to a clean serving dish and keep warm.

4. Cook the chicken

Arrange the coated chicken pieces in the air fryer basket in a single layer. Cook in batches if necessary.

Air fry at 190°C for approximately 10–14 minutes, turning halfway through, until lightly golden and cooked all the way through.

Use a food thermometer to check that the thickest pieces reach a core temperature of 75°C. Cooking times vary depending on the size of the pieces and the air fryer model.

5. Prepare the Buffalo-inspired sauce

While the chicken cooks, combine the hot sauce, tomato purée, honey, lemon juice and smoked paprika in a small saucepan.

Warm gently for 2–3 minutes, stirring until smooth. Add a little warm water if needed to create a coating consistency.

Taste and adjust the heat by adding a little more tomato purée or water if preferred.

6. Make the garlic yoghurt dip

Mix the Greek yoghurt, garlic, lemon juice, parsley and black pepper in a small bowl.

Cover and refrigerate until ready to serve.

7. Coat the chicken and cauliflower

Place the cooked chicken and cauliflower in a large clean bowl.

Pour over the warm Buffalo-inspired sauce and toss gently until everything is lightly coated. Add the sauce gradually so the pieces remain as crisp as possible.

8. Serve

Divide the Buffalo chicken and cauliflower between four plates.

Serve with the garlic yoghurt dip, carrot sticks, cucumber and mixed salad leaves. Add lemon wedges if you like a little extra freshness.

Tips for the Best Air Fryer Buffalo Chicken

Keep the pieces evenly sized. This helps the chicken cook at a similar rate.

Cook the cauliflower separately. It releases moisture and usually needs a different cooking time from the chicken.

Use a light coating of cornflour. A small amount helps the surface become golden without creating a thick batter.

Do not overcrowd the basket. Cook in batches if necessary for more even browning.

Add the sauce just before serving. Coating the bites too early will soften their crisp edges.

Choose your preferred hot sauce. Different brands vary considerably in heat and salt content, so start with a smaller amount if needed.

Easy Budget-Friendly Variations

Mild Buffalo Chicken Bites

Reduce the hot sauce to 1 tablespoon and add a little extra tomato purée and water for a gentler flavour.

Chicken Thigh Version

Use skinless, boneless chicken thigh pieces if they are better value at your local supermarket. Adjust the cooking time and check that the chicken is fully cooked.

Vegetarian Buffalo Cauliflower

Leave out the chicken and increase the cauliflower. Serve with a portion of cooked chickpeas or another protein source for a more substantial meal.

Make It More Filling

Add a small baked potato, brown rice or a wholemeal wrap alongside the chicken and vegetables.

Extra Crunch

Scatter a little finely chopped spring onion over the finished dish just before serving.

Can You Make Buffalo Chicken Bites Ahead?

Yes. You can cut and season the cauliflower in advance and prepare the yoghurt dip the day before.

Keep raw chicken covered in the fridge and separate from ready-to-eat ingredients. For the best texture, cook the bites shortly before serving and add the Buffalo sauce at the end.

How to Store and Reheat

Allow leftovers to cool promptly, then transfer them to an airtight container and refrigerate at 5°C or below for up to 2 days.

Store the garlic yoghurt dip separately and keep it chilled.

Reheat the chicken and cauliflower in the air fryer at 170°C for approximately 4–6 minutes, or until the chicken is piping hot throughout. Reheat only once.

The coating may soften during storage, particularly if the bites have already been mixed with the sauce.

Freezing the cooked, unsauced chicken is possible, although the cauliflower may lose some of its texture after thawing. Defrost thoroughly in the fridge before reheating.

Frequently Asked Questions

Can I use frozen cauliflower?

Yes, although frozen cauliflower contains more moisture and may not become quite as crisp. Cook it from frozen according to the packet guidance, allowing extra time if needed.

How spicy are Buffalo chicken bites?

That depends on the hot sauce you choose. Start with a smaller quantity for a milder family-friendly version, then add more to taste.

Can I make these without cornflour?

Yes. The chicken and cauliflower will still cook well, although the outside may be slightly less crisp.

How do I know when the chicken is cooked?

Check the thickest pieces with a food thermometer. They should reach a core temperature of 75°C.

Can I prepare the yoghurt dip in advance?

Yes. Keep it covered in the fridge and use within 2 days. Stir before serving.

More Easy Air Fryer Recipes

If you enjoy homemade air fryer meals, try our Air Fryer Chicken Shawarma & Crispy Chickpea Bowls for another colourful chicken dinner, or our Air Fryer Cottage Cheese Pizza Flatbreads for a quick homemade pizza alternative.

You can also explore our Budget Family Meals UK guide for more affordable everyday cooking ideas.

A Homemade Alternative to Takeaway Chicken

These air fryer Buffalo chicken and cauliflower bites combine warm spices, a tangy sauce and a refreshing garlic yoghurt dip in one easy meal. Serve them fresh from the air fryer for a colourful family dinner or a relaxed weekend lunch.

Air Fryer Cottage Cheese Pizza Flatbreads

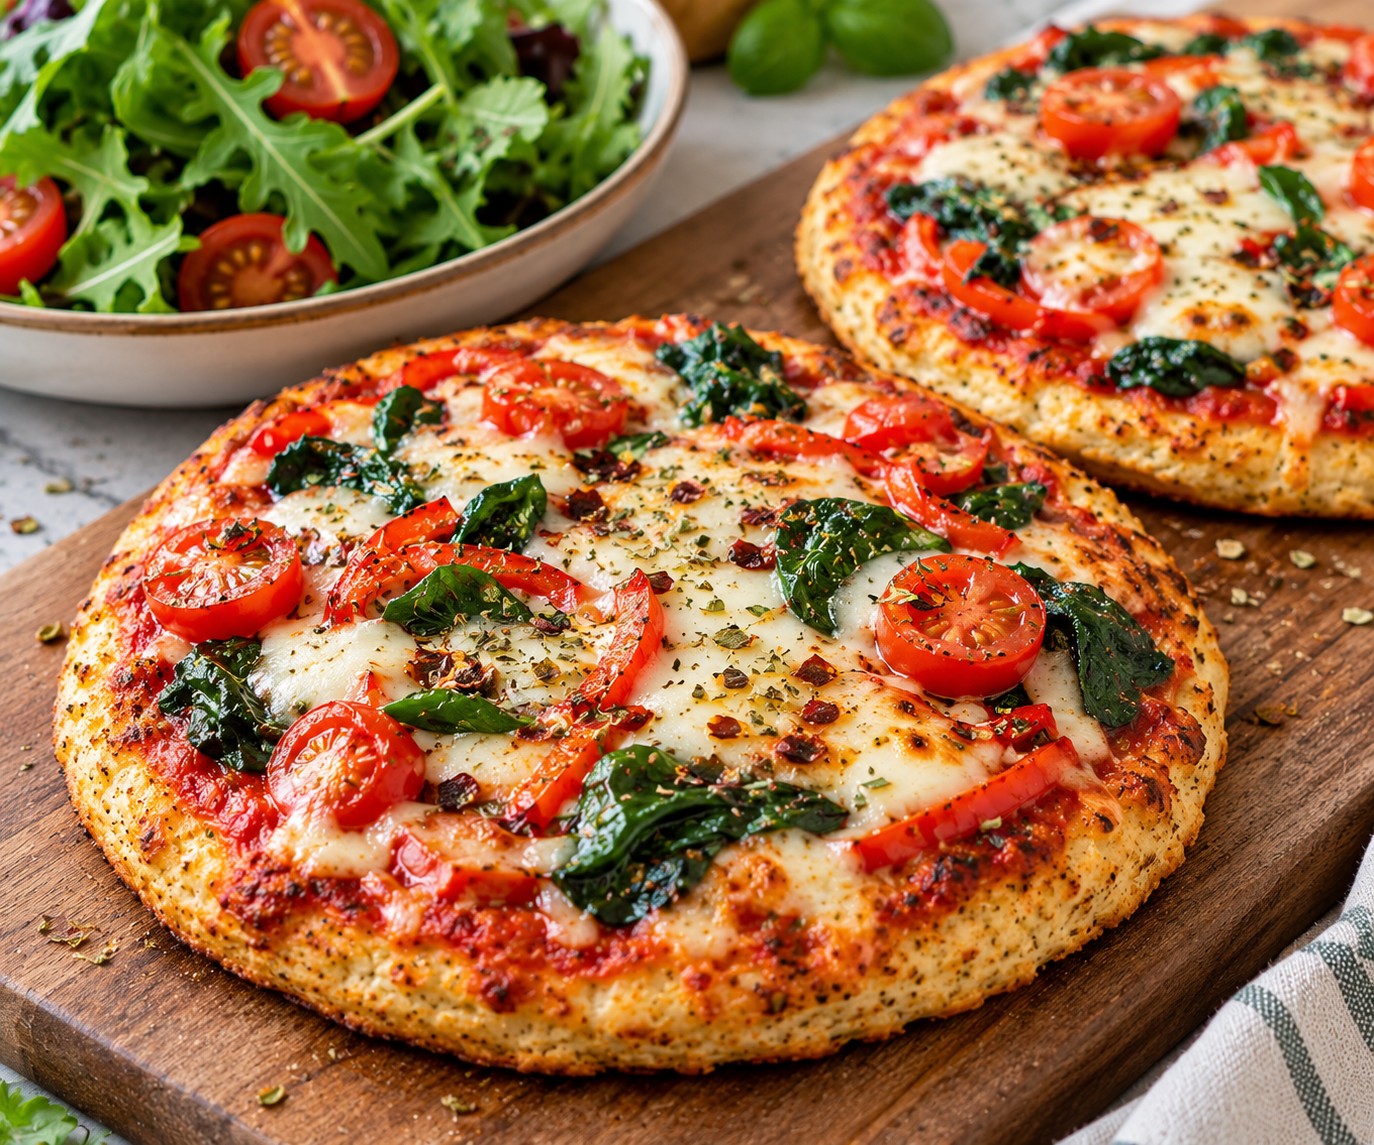
Two air fryer cottage cheese pizza flatbreads topped with tomato, spinach and melted mozzarella

These air fryer cottage cheese pizza flatbreads are a simple way to enjoy homemade pizza flavours using everyday ingredients. The base combines cottage cheese, eggs and oats, while a topping of tomato sauce, spinach and mozzarella adds plenty of flavour without the need to make traditional pizza dough.

The flatbreads are soft in the middle with lightly golden edges, making them ideal for a quick lunch or an easy dinner served with a crunchy side salad.

Recipe Details

  • Servings: 2
  • Preparation time: 10 minutes
  • Cooking time: 16–22 minutes, plus additional time if cooking in batches
  • Total time: Approximately 30–35 minutes
  • Cooking method: Air fryer

Ingredients

For the cottage cheese flatbread bases

  • 200g reduced-fat cottage cheese
  • 2 medium eggs
  • 50g porridge oats
  • ½ tsp dried oregano
  • ¼ tsp garlic granules
  • Freshly ground black pepper
  • A little oil spray, for greasing

For the pizza topping

  • 4 tbsp passata
  • ½ tsp dried mixed Italian herbs
  • 40g baby spinach, roughly chopped
  • 60g reduced-fat mozzarella, grated or torn into small pieces
  • 6 cherry tomatoes, halved
  • ½ small red pepper, thinly sliced
  • A pinch of chilli flakes, optional

To serve

  • A handful of rocket or mixed salad leaves, optional

How to Make Air Fryer Cottage Cheese Pizza Flatbreads

1. Prepare the flatbread mixture

Place the cottage cheese, eggs, oats, oregano, garlic granules and black pepper in a blender or food processor.

Blend until mostly smooth. Leave the mixture to stand for 5 minutes so the oats can absorb some of the moisture.

2. Shape the bases

Preheat the air fryer to 180°C, if required by your model.

Lightly grease two small air-fryer-safe cake tins or solid baking dishes that fit inside your basket. Divide the mixture between them, spreading it into two even circles approximately 1cm thick.

If only one tin fits, cook the flatbreads separately.

3. Cook the flatbread bases

Air fry at 180°C for approximately 10–14 minutes, until the tops look set and the edges are lightly golden.

Allow the bases to rest for 2 minutes before carefully loosening them from the tins. They should hold together but will remain softer than traditional pizza dough.

If the underside is still very moist, return the bases to the air fryer for another 2–3 minutes before adding the toppings.

4. Prepare the pizza sauce

Mix the passata with the dried Italian herbs and a little black pepper.

Spread the sauce thinly over each cooked flatbread base, leaving a small border around the edges.

5. Add the toppings

Divide the spinach, cherry tomatoes and red pepper between the two bases. Sprinkle over the mozzarella and add chilli flakes if using.

Avoid adding too much sauce or piling the vegetables too high, as excess moisture can make the bases soggy.

6. Finish in the air fryer

Return the topped flatbreads to the air fryer and cook at 180°C for 5–8 minutes, until the cheese has melted and the vegetables have softened.

Check regularly towards the end of cooking, as mozzarella can brown quickly in some air fryers.

7. Serve

Leave the flatbreads to stand for 2 minutes, then transfer to plates. Serve warm with rocket or a simple mixed salad.

Tips for the Best Cottage Cheese Pizza Flatbreads

Blend the base well. A mostly smooth mixture creates a more even texture.

Use a suitable baking dish. The mixture starts as a batter, so it needs a solid, air-fryer-safe tin rather than loose baking parchment.

Cook the base before adding toppings. This helps prevent a wet centre.

Keep the sauce layer thin. Too much passata can soften the flatbread.

Do not expect a traditional pizza crust. Cottage cheese flatbreads are naturally softer and more delicate than bread dough.

Easy Budget-Friendly Variations

Mushroom and spinach: Replace the pepper with a few thinly sliced mushrooms. Cook off excess moisture first if needed.

Chicken pizza: Add a little leftover cooked chicken before the final air-frying stage. Make sure it is reheated thoroughly.

Tuna and sweetcorn: Use a small amount of drained tinned tuna and sweetcorn for an easy store-cupboard topping.

Vegetable pizza: Try thinly sliced courgette, red onion or leftover cooked vegetables.

Different cheese: A little grated mature Cheddar can replace the mozzarella if that is what you already have.

Can You Make Cottage Cheese Flatbreads Ahead?

Yes. Cook the bases in advance, allow them to cool and refrigerate them in an airtight container. Add the pizza toppings just before reheating.

For the best texture, avoid assembling the pizzas too far ahead, as the tomato sauce may soften the bases.

How to Store and Reheat

Allow any leftovers to cool promptly, then store covered in the fridge at 5°C or below for up to 2 days.

Reheat in the air fryer at 160°C for approximately 3–5 minutes, or until piping hot throughout. Reheat only once.

Freezing the plain cooked bases is possible, although their texture may become softer after thawing. Defrost in the fridge before topping and reheating.

Frequently Asked Questions

Can I make cottage cheese pizza flatbreads without a blender?

Yes. Mash the cottage cheese thoroughly with a fork and use finely ground oats or oat flour. The texture will be slightly less smooth.

Are these flatbreads crispy?

They develop lightly golden edges, but the centre remains soft because the base is made with cottage cheese and eggs rather than traditional dough.

Can I use full-fat cottage cheese?

Yes. Full-fat cottage cheese works, although the moisture content varies between brands and may slightly affect the cooking time.

Why is my flatbread soggy?

The base may need longer to set before topping, or the sauce and vegetables may have added too much moisture. Cook the base fully and use a thin layer of passata.

Can I cook these without a baking tin?

A shallow, solid air-fryer-safe dish is recommended because the uncooked mixture is too soft to hold its shape directly on the basket.

More Easy Meal Ideas

If you enjoy simple homemade meals, explore our Budget Family Meals UK guide for affordable cooking inspiration and our Healthy High-Protein & Fibre-Rich Recipes collection for more breakfast, lunch and dinner ideas.

An Easy Homemade Pizza Alternative

These cottage cheese pizza flatbreads are a practical way to turn a few everyday ingredients into a satisfying homemade meal. Experiment with your favourite toppings and serve them fresh from the air fryer with a colourful side salad.

Air Fryer Chicken Shawarma & Crispy Chickpea Bowls

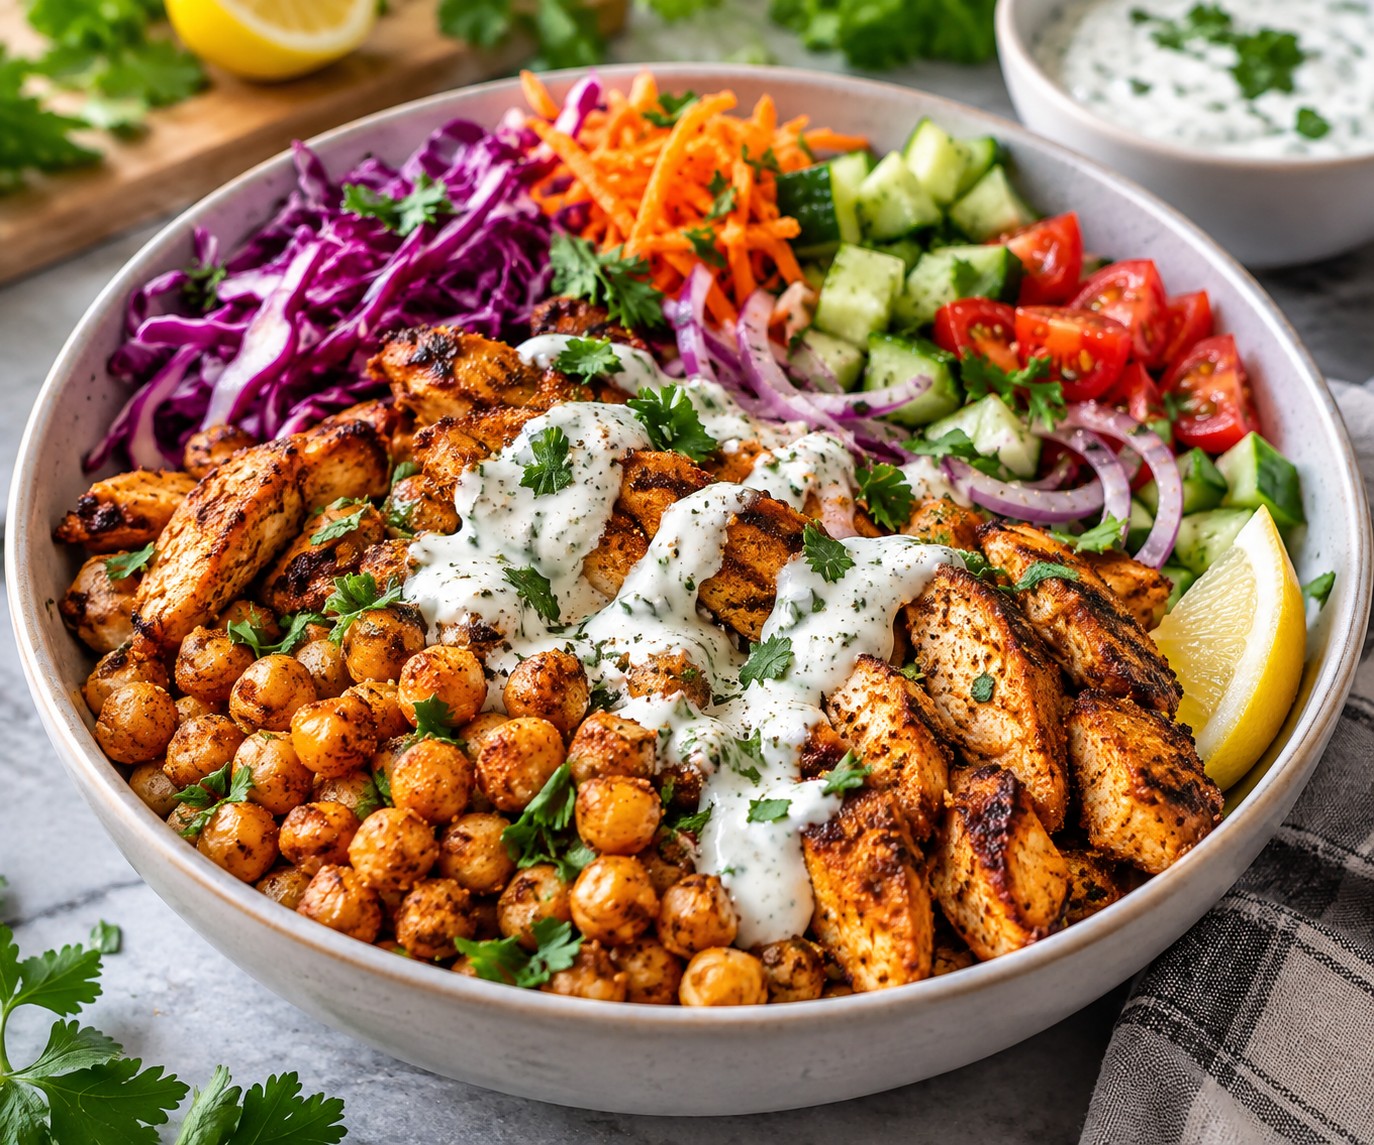
Air fryer chicken shawarma bowl with crispy chickpeas, fresh salad and lemon yoghurt sauce

These air fryer chicken shawarma bowls bring together juicy, warmly spiced chicken, crispy chickpeas, crunchy vegetables and a refreshing lemon yoghurt sauce. They have all the flavour of a takeaway-inspired meal, using simple ingredients that are easy to find in UK supermarkets.

The chicken and chickpeas cook in the air fryer with very little added oil, while the salad and yoghurt sauce keep everything fresh. Serve the bowls as they are for a lighter lunch, or add a little brown rice or warm wholemeal pitta for a more substantial dinner.

Recipe Details

  • Servings: 4
  • Preparation time: 20 minutes
  • Marinating time: 15 minutes, optional
  • Cooking time: Approximately 25–30 minutes, cooking in batches
  • Total time: Approximately 45–50 minutes
  • Cooking method: Air fryer

Ingredients

Shawarma chicken

  • 500g skinless, boneless chicken breast, cut into even bite-sized pieces
  • 150g fat-free natural Greek yoghurt
  • 1 tbsp lemon juice
  • 2 garlic cloves, crushed
  • 1 tsp ground cumin
  • 1 tsp smoked paprika
  • 1 tsp ground coriander
  • ½ tsp ground turmeric
  • ½ tsp ground cinnamon
  • ¼ tsp chilli powder, optional
  • 1 tsp olive oil
  • Freshly ground black pepper
  • A small pinch of salt

Crispy chickpeas

  • 1 x 400g tin chickpeas, drained and rinsed
  • 1 tsp olive oil
  • ½ tsp smoked paprika
  • ½ tsp ground cumin
  • A pinch of garlic granules

Salad bowls

  • ½ small red cabbage, finely shredded (approximately 200g)
  • 1 medium cucumber, diced
  • 2 medium tomatoes, chopped
  • 1 small red onion, thinly sliced
  • 1 small carrot, grated
  • A handful of fresh parsley, optional
  • Lemon wedges, to serve

Lemon yoghurt sauce

  • 150g fat-free natural Greek yoghurt
  • 1 tbsp lemon juice
  • 1 small garlic clove, finely grated
  • 1–2 tbsp cold water, to loosen
  • Freshly ground black pepper

How to Make Air Fryer Chicken Shawarma Bowls

1. Marinate the chicken

Place the chicken pieces in a mixing bowl. Add the yoghurt, lemon juice, garlic, cumin, paprika, coriander, turmeric, cinnamon, chilli powder, olive oil, salt and pepper.

Mix until every piece is evenly coated. Cover and refrigerate for 15 minutes while you prepare the remaining ingredients. If you have more time, the chicken can marinate in the fridge for up to 4 hours.

2. Prepare the chickpeas

Drain and rinse the chickpeas thoroughly, then pat them dry with kitchen paper or a clean tea towel. Removing excess moisture helps them become crisp.

Toss with the olive oil, smoked paprika, cumin and garlic granules.

3. Cook the crispy chickpeas

Preheat the air fryer to 190°C, if your model requires preheating.

Spread the chickpeas in a single layer in the basket. Air fry for 12–16 minutes, shaking the basket every 4–5 minutes, until golden and lightly crisp.

Transfer to a plate and leave to cool slightly. They will firm up a little as they cool.

4. Air fry the shawarma chicken

Set the air fryer to 190°C.

Arrange the marinated chicken in a single layer, allowing a little space between the pieces. Cook in batches if necessary.

Air fry for approximately 12–16 minutes, turning halfway through, until lightly browned and completely cooked. Check that the thickest pieces reach a core temperature of 75°C using a food thermometer.

Cooking times vary depending on your air fryer and the size of the chicken pieces.

5. Make the lemon yoghurt sauce

In a small bowl, mix the Greek yoghurt, lemon juice, grated garlic and black pepper.

Add the cold water a little at a time until the sauce reaches a spoonable consistency. Refrigerate until needed.

6. Prepare the salad

Divide the shredded cabbage, cucumber, tomatoes, red onion and grated carrot between four serving bowls.

Add a little chopped parsley if using.

7. Assemble the bowls

Top each salad bowl with a portion of warm shawarma chicken and crispy chickpeas.

Spoon over the lemon yoghurt sauce and serve with lemon wedges. For a heartier meal, add a small portion of cooked brown rice or a warm wholemeal pitta.

Tips for the Best Air Fryer Chicken Shawarma

Cut the chicken evenly. Similar-sized pieces cook more consistently and are less likely to dry out.

Avoid overcrowding the basket. Cook the chicken in batches if needed, allowing the hot air to circulate.

Dry the chickpeas well. Moisture is the main reason they may turn soft rather than crisp.

Adjust the spice level. Leave out the chilli powder for a milder, family-friendly version.

Keep the sauce separate for meal prep. Add it just before eating to keep the salad fresh.

Easy Budget-Friendly Variations

Use chicken thighs: Skinless, boneless chicken thighs work well if they are cheaper locally. Adjust the cooking time and check they are fully cooked.

Swap the vegetables: Use lettuce, grated beetroot or any crunchy vegetables already in your fridge.

Try a vegetarian bowl: Replace the chicken with additional chickpeas and cubes of firm tofu. Cook them separately and season with the same shawarma-inspired spices.

Make it more filling: Serve with brown rice, bulgur wheat or wholemeal pitta.

Use dried chickpeas: Cook them fully before following the crispy chickpea method. Do not place uncooked dried chickpeas directly in the air fryer.

Can You Make These Shawarma Bowls Ahead?

Yes. Prepare the chicken, sauce and chopped vegetables in advance, then store each component separately in the fridge.

The chickpeas are at their crispiest when freshly cooked, so prepare them close to serving if possible.

How to Store and Reheat

Allow the cooked chicken to cool promptly, then refrigerate in an airtight container at 5°C or below for up to 2 days.

Store the yoghurt sauce and prepared salad separately. Reheat the chicken thoroughly until piping hot throughout, and only reheat it once.

The chickpeas may soften during storage. You can briefly return them to the air fryer to restore some of their texture.

Do not leave the assembled bowls at room temperature for extended periods.

Frequently Asked Questions

Can I use frozen chicken in this recipe?

Thaw the chicken fully in the fridge before marinating. This allows the seasoning to coat the pieces evenly and makes cooking times more predictable.

How do I stop air fryer chicken from drying out?

Use evenly sized pieces, avoid overcrowding and check the internal temperature rather than cooking for longer than necessary.

Are these chicken shawarma bowls suitable for meal prep?

Yes. Store the cooked chicken, salad, chickpeas and yoghurt sauce in separate containers, then assemble shortly before eating.

Can I make the chickpeas without oil?

You can, although a small amount of oil helps the spices coat the chickpeas and encourages more even browning.

What can I serve instead of rice?

Wholemeal pitta, bulgur wheat or an extra portion of salad all work well, depending on your appetite.

More Healthy Meal Ideas

Looking for more everyday meal inspiration? Explore our Budget Family Meals UK guide for affordable cooking ideas, or browse our Healthy High-Protein & Fibre-Rich Recipes collection for more balanced breakfast, lunch and dinner recipes.

A Fresh Takeaway-Inspired Dinner

These air fryer chicken shawarma bowls are colourful, satisfying and easy to adapt to what you already have at home. With spiced chicken, crispy chickpeas and a tangy yoghurt dressing, they make a practical family dinner or a convenient make-ahead lunch.