Harissa Chicken in an Air Fryer

Harissa Chicken in an Air Fryer

Harissa Chicken in an Air Fryer. Embark on a flavor adventure with this tantalizing recipe for Air Fryer Harissa Chicken. Prepare to be captivated by the symphony of spices, textures, and aromas that will tantalize your taste buds and leave you craving more.

This recipe distinguishes itself in its use of harissa paste, which is a North African chili pepper paste that is used as a condiment or a marinade. It gives the chicken a spicy and flavorful flavor.

Harissa paste has been used for centuries in North African cuisine, and it has become more popular in recent years in the United States. It is made from chili peppers, spices, herbs, and sometimes tomatoes, and it can be used in a variety of dishes, including stews, tagines, and marinades.

This recipe uses harissa paste to marinade bone-in, skinless chicken thighs. The chicken is then air-fried until it is cooked through and crispy. The result is a flavorful and healthy dish that is sure to please everyone at the table.

Harissa Chicken in an Air Fryer Harissa Chicken in an Air Fryer. Embark on a flavor adventure with this tantalizing recipe for Air Fryer Harissa Chicken. Prepare to be captivated by the symphony of spices, textures, and aromas that will tantalize your taste buds and leave you craving more. This recipe distinguishes itself in its use of harissa paste, which is a North African chili pepper paste that is used as a condiment or a marinade. It gives the chicken a spicy and flavorful flavor. Harissa paste has been used for centuries in North African cuisine, and it has become more popular in recent years in the United States. It is made from chili peppers, spices, herbs, and sometimes tomatoes, and it can be used in a variety of dishes, including stews, tagines, and marinades. This recipe uses harissa paste to marinade bone-in, skinless chicken thighs. The chicken is then air-fried until it is cooked through and crispy. The result is a flavorful and healthy dish that is sure to please everyone at the table. ere are some of the specific ways in which this recipe distinguishes itself from other chicken recipes: The use of harissa paste is unique and gives the chicken a bold and complex flavor. The recipe includes reduced-fat mayonnaise, which helps to balance out the heat of the harissa. The low-calorie spray ensures that the chicken is crispy without being greasy. The fresh mint garnish adds a touch of herbaceous freshness. Overall, this is a unique and flavorful recipe that will appeal to both chicken lovers and those who enjoy spicy food. Ingredients: 7 Bone-In, Skinless Chicken Thighs 1 Tablespoon of Sweet Paprika: A touch of sweetness to balance the fiery harissa paste. Salt and Black Pepper: Essential seasonings to enhance the natural flavors of the chicken. 2 Tablespoons of Harissa Paste: A fiery blend of chili peppers, spices, and herbs that adds a bold kick. 3 Tablespoons of Reduced-Fat Mayonnaise 2 Teaspoons of Chopped/Minced Garlic: A pungent element that infuses the chicken with intense flavor. Low-Calorie Spray: A healthy alternative to oil for a crispy exterior. Instructions: Marination Mastery: Combine the chicken, paprika, salt, pepper, harissa paste, mayonnaise, and garlic in a bowl. Mix thoroughly until the chicken is evenly coated with the enticing marinade. Spray on Flavor: Mist the chicken with low-calorie spray to ensure a crispy and flavorful exterior. Air Frying Expertise: Preheat your air fryer to 390°F (200°C). Arrange the marinated chicken thighs on the air fryer grill pan, ensuring even spacing for optimal air circulation. Grilling Perfection: Air fry the chicken for 20-22 minutes, flipping halfway through to achieve even cooking and a delightful golden-brown crust. Garnish : Elevate the dish with a sprinkle of fresh mint Tips: Don't overmix the marinade. Overmixing can toughen the chicken. Marinate the chicken for at least 30 minutes, but up to 2 hours. The longer the chicken marinates, the more flavorful it will be. Make sure to spray the chicken with low-calorie spray before air frying. This will help to ensure that the chicken gets crispy. Don't crowd the air fryer basket. Air circulation is important for getting crispy chicken, so make sure to leave enough space between the chicken pieces. Flip the chicken halfway through cooking. This will help to ensure that the chicken cooks evenly. Taste the chicken before serving. You may need to adjust the seasonings to your liking. Here are some additional tips for making this recipe even more flavorful: Add a pinch of cumin to the marinade. Infuse the marinade with lemon juice or lime juice for a touch of citrusy brightness. Sprinkle the chicken with chopped fresh cilantro before serving for a burst of freshness. Serve the chicken with a side of yogurt or hummus. Enjoy the flavorful and crispy Air Fryer Harissa Chicken! mynrecipes.com

ere are some of the specific ways in which this recipe distinguishes itself from other chicken recipes:

  • The use of harissa paste is unique and gives the chicken a bold and complex flavor.
  • The recipe includes reduced-fat mayonnaise, which helps to balance out the heat of the harissa.
  • The low-calorie spray ensures that the chicken is crispy without being greasy.
  • The fresh mint garnish adds a touch of herbaceous freshness.
  • Overall, this is a unique and flavorful recipe that will appeal to both chicken lovers and those who enjoy spicy food.

About Time:

  • Prep Time: 15mins
  • Cook Time: 22 mins
  • Total Time: 37 mins
  • Yield: 7 Thighs
  • 3 syns per serving
  • syns cost per yield of 7 thighs is 21 syns

Go to the next page to get the Ingredients

Overnight S’mores Delight

Overnight S'mores Delight Indulge in the nostalgic flavors of s'mores without the campfire hassle with this delectable Overnight Oats recipe. Packed with wholesome oats, rich cocoa powder, and a touch of sweetness, this dish is a delightful treat for a quick and nutritious breakfast. The S'mores Overnight Oats recipe was invented to provide a quick, easy, and delicious way to enjoy the flavors of s'mores without the hassle of making a campfire. It is a popular breakfast or snack option because it is packed with whole grains, protein, and fiber, and it is also low in calories and fat. Here are some of the reasons why S'mores Overnight Oats recipe is so popular: It is easy to make. The recipe only requires a few simple ingredients and takes about 5 minutes to prepare. It is delicious. It tastes just like a s'more, but it is healthier and more convenient. It is portable. You can easily pack S'mores Overnight Oats in a jar or container for a quick and healthy breakfast or snack on the go. It can be customized. You can add your own personal touches to the recipe, such as different types of chocolate chips, marshmallows, or nuts. It is a healthy option. S'mores Overnight Oats are a good source of whole grains, protein, and fiber. They are also low in calories and fat. If you are looking for a delicious, healthy, and easy breakfast or snack option, then S'mores Overnight Oats is a great recipe to try. About Time: Prep Time: 15 mins Cook Time: 15 mins Total Time: 30 mins Yield: 1 Serving Total syns per serving: 7 Ingredients: 40g (1.5 oz) rolled oats - 2 syns ½ cup (120ml) fat-free vanilla yoghurt (not Greek)- 1 syn ½ teaspoon pure vanilla extract - 0 syns ¾ tablespoon sukrin:1 (a zero-calorie sweetener) - 0 syns ½ level tablespoon unsweetened cocoa powder - 0 syns 1 low-calorie cookie - 1 syn 10g (0.5oz) mini marshmallows - 2 syns 4g (0.14oz) chocolate chips - 1 syn Total syns per serving: 7 Go to the next page to get the Instructions Instructions: In a mixing bowl, combine the rolled oats, vanilla yoghurt, vanilla extract, cocoa powder, and sukrin:1. If the mixture seems too thick, add a little more yoghurt until desired consistency is achieved. Divide the oat mixture evenly into two glasses or jars. In each glass, layer half of the mini marshmallows. Top each glass with the remaining oat mixture. Sprinkle the remaining mini marshmallows, chocolate chips, and crumble the low-calorie cookie over the top of each glass. Refrigerate overnight or for at least 4 hours to allow the oats to soften and the flavors to meld. Nutritional Information: Servings: 1 Serving Size: 1 glass Per Serving: Calories: 281 Total Fat: 5.6g Saturated Fat: 1.7g Sodium: 107mg Carbohydrates: 47.4g Fiber: 4.7g Sugar: 15.7g Enjoy this s'mores-inspired breakfast delight for a burst of flavor and a boost of energy to fuel your day. mynrecipes.com

Overnight S’mores Delight

Indulge in the nostalgic flavors of s’mores without the campfire hassle with this delectable Overnight Oats recipe. Packed with wholesome oats, rich cocoa powder, and a touch of sweetness, this dish is a delightful treat for a quick and nutritious breakfast.

The S’mores Overnight Oats recipe was invented to provide a quick, easy, and delicious way to enjoy the flavors of s’mores without the hassle of making a campfire. It is a popular breakfast or snack option because it is packed with whole grains, protein, and fiber, and it is also low in calories and fat.

Here are some of the reasons why S’mores Overnight Oats recipe is so popular:

  1. It is easy to make. The recipe only requires a few simple ingredients and takes about 5 minutes to prepare.
  2. It is delicious. It tastes just like a s’more, but it is healthier and more convenient.
  3. It is portable. You can easily pack S’mores Overnight Oats in a jar or container for a quick and healthy breakfast or snack on the go.
  4. It can be customized. You can add your own personal touches to the recipe, such as different types of chocolate chips, marshmallows, or nuts.
  5. It is a healthy option. S’mores Overnight Oats are a good source of whole grains, protein, and fiber. They are also low in calories and fat.
  6. If you are looking for a delicious, healthy, and easy breakfast or snack option, then S’mores Overnight Oats is a great recipe to try.

Can You store a Recipe: Overnight S’mores Delight ?

Yes, S’mores Overnight Oats can be stored in an airtight container in the refrigerator for up to 5 days. To prevent the marshmallows from getting soggy, add them to the oats just before serving.

Here are some additional tips for storing S’mores Overnight Oats:

  • Use a clean and dry container. This will help to prevent the oats from absorbing any unwanted flavors or aromas from the refrigerator.
  • Label the container with the date. This will help you to keep track of how long the oats have been stored.
  • Shake the container before eating. This will help to evenly distribute the ingredients.

Overnight S'mores Delight Indulge in the nostalgic flavors of s'mores without the campfire hassle with this delectable Overnight Oats recipe. Packed with wholesome oats, rich cocoa powder, and a touch of sweetness, this dish is a delightful treat for a quick and nutritious breakfast. The S'mores Overnight Oats recipe was invented to provide a quick, easy, and delicious way to enjoy the flavors of s'mores without the hassle of making a campfire. It is a popular breakfast or snack option because it is packed with whole grains, protein, and fiber, and it is also low in calories and fat. Here are some of the reasons why S'mores Overnight Oats recipe is so popular: It is easy to make. The recipe only requires a few simple ingredients and takes about 5 minutes to prepare. It is delicious. It tastes just like a s'more, but it is healthier and more convenient. It is portable. You can easily pack S'mores Overnight Oats in a jar or container for a quick and healthy breakfast or snack on the go. It can be customized. You can add your own personal touches to the recipe, such as different types of chocolate chips, marshmallows, or nuts. It is a healthy option. S'mores Overnight Oats are a good source of whole grains, protein, and fiber. They are also low in calories and fat. If you are looking for a delicious, healthy, and easy breakfast or snack option, then S'mores Overnight Oats is a great recipe to try. About Time: Prep Time: 15 mins Cook Time: 15 mins Total Time: 30 mins Yield: 1 Serving Total syns per serving: 7 Ingredients: 40g (1.5 oz) rolled oats - 2 syns ½ cup (120ml) fat-free vanilla yoghurt (not Greek)- 1 syn ½ teaspoon pure vanilla extract - 0 syns ¾ tablespoon sukrin:1 (a zero-calorie sweetener) - 0 syns ½ level tablespoon unsweetened cocoa powder - 0 syns 1 low-calorie cookie - 1 syn 10g (0.5oz) mini marshmallows - 2 syns 4g (0.14oz) chocolate chips - 1 syn Total syns per serving: 7 Go to the next page to get the Instructions Instructions: In a mixing bowl, combine the rolled oats, vanilla yoghurt, vanilla extract, cocoa powder, and sukrin:1. If the mixture seems too thick, add a little more yoghurt until desired consistency is achieved. Divide the oat mixture evenly into two glasses or jars. In each glass, layer half of the mini marshmallows. Top each glass with the remaining oat mixture. Sprinkle the remaining mini marshmallows, chocolate chips, and crumble the low-calorie cookie over the top of each glass. Refrigerate overnight or for at least 4 hours to allow the oats to soften and the flavors to meld. Nutritional Information: Servings: 1 Serving Size: 1 glass Per Serving: Calories: 281 Total Fat: 5.6g Saturated Fat: 1.7g Sodium: 107mg Carbohydrates: 47.4g Fiber: 4.7g Sugar: 15.7g Enjoy this s'mores-inspired breakfast delight for a burst of flavor and a boost of energy to fuel your day.

About Time:

  • Prep Time: 15 mins
  • Cook Time: 15 mins
  • Total Time: 30 mins
  • Yield: 1 Serving
  • Total syns per serving: 7

Go to the next page to get the Ingredients

Easy Tomato and Basil Soup – Budget-Friendly Homemade Recipe

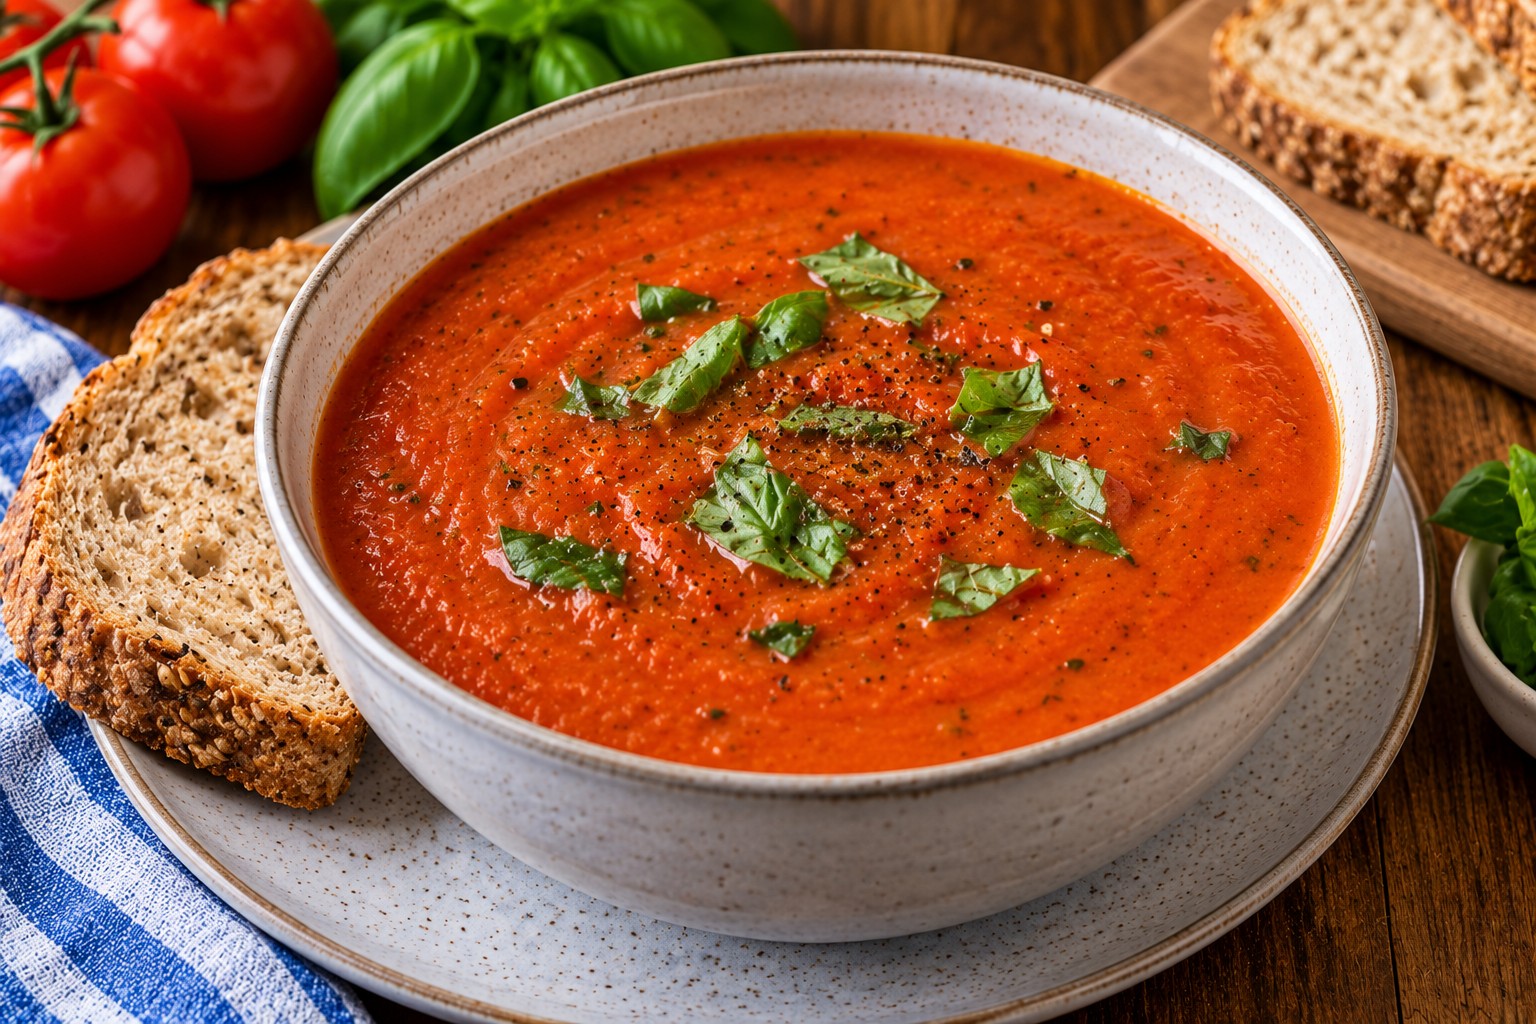
Bowl of smooth homemade tomato and basil soup garnished with fresh basil and black pepper.

A warming bowl of homemade tomato and basil soup doesn’t need expensive fresh tomatoes or a long shopping list. This simple recipe uses tinned chopped tomatoes, passata and everyday vegetables to create a comforting soup with a rich tomato flavour.

Onion, carrot and celery are gently softened before the tomatoes and stock are added. This gives the soup a naturally rounded flavour, while basil brings a fresh, aromatic finish. Blend it until smooth for a classic tomato soup, or leave a little texture if you prefer something more rustic.

Made with familiar UK supermarket ingredients, it’s an affordable lunch, a light family dinner or a useful batch-cooking recipe for busy weeks.

Why This Homemade Tomato Soup Works

  • Uses tinned tomatoes and passata, so you can make it throughout the year.
  • Contains everyday vegetables that help build flavour naturally.
  • Doesn’t require cream or an expensive ready-made soup.
  • Can be blended smooth or left slightly chunky.
  • Suitable for preparing ahead and freezing in individual portions.

Recipe at a Glance

DetailsInformation
ServingsApproximately 4
Preparation time10 minutes
Cooking time30–35 minutes
Total time40–45 minutes
CourseLunch, starter or light dinner
Cooking methodHob
Dietary informationVegan when using suitable vegetable stock and plant-based accompaniments

Ingredients

  • 1 onion, diced
  • 2 carrots, diced
  • 2 celery sticks, diced
  • 2 garlic cloves, crushed
  • 1 × 400g tin chopped tomatoes
  • 500g tomato passata
  • 500ml vegetable stock
  • 1 tbsp tomato purée
  • 1 tbsp vegetable oil
  • 1 handful fresh basil, or 1 tsp dried basil
  • Freshly ground black pepper

Ingredient Notes and Easy Substitutions

Tinned tomatoes: A standard tin of chopped tomatoes provides a convenient, affordable base. Supermarket own-brand varieties work well.

Passata: Gives the soup a smoother tomato consistency without needing lots of fresh tomatoes.

Carrots: Add a little natural sweetness, helping balance the acidity of the tomatoes.

Celery: Adds savoury depth. If you don’t have any, the soup can still be made with onion and carrot.

Tomato purée: Concentrates the tomato flavour. Cooking it briefly with the garlic helps develop the base of the soup.

Basil: Fresh basil adds a fragrant finish, but dried basil is a useful cupboard alternative.

Vegetable stock: Choose a lower-salt variety if preferred. Check the ingredients if preparing the soup for a vegan household.

How to Make Tomato and Basil Soup

Step 1: Prepare the Vegetables

Peel and dice the onion and carrots.

Dice the celery into small pieces and crush the garlic.

Cutting the vegetables into reasonably even pieces helps them soften at a similar rate.

Step 2: Soften the Onion, Carrot and Celery

Heat the vegetable oil in a large saucepan over a medium-low heat.

Add the onion, carrots and celery.

Cook gently for 8–10 minutes, stirring occasionally, until the vegetables begin to soften.

Avoid rushing this stage. Gently cooked vegetables provide a more rounded flavour than adding everything directly to boiling stock.

Step 3: Add the Garlic and Tomato Purée

Stir in the crushed garlic and tomato purée.

Cook for approximately one minute, stirring to prevent the garlic from catching.

Step 4: Add the Tomatoes and Stock

Pour in the chopped tomatoes, passata and vegetable stock.

Stir well, scraping any tomato purée from the bottom of the pan.

Bring the mixture to a gentle simmer.

Step 5: Simmer Until the Vegetables Are Tender

Reduce the heat and simmer for approximately 20–25 minutes.

Stir occasionally and check that the carrots and celery are soft enough to blend.

If the soup becomes thicker than you prefer, add a small splash of hot water.

Step 6: Add the Basil and Blend

Stir in the fresh or dried basil.

For a smooth soup, blend carefully using a stick blender, keeping the blender head submerged to avoid splashes.

Alternatively, leave some of the vegetables unblended for a more rustic texture.

If using a jug blender, follow its instructions for handling hot liquids and blend in suitable batches.

Step 7: Season and Serve

Taste the soup and add freshly ground black pepper.

Serve warm with bread, toast or your preferred accompaniment.

How to Give Tomato Soup More Flavour Without Cream

The flavour of this soup comes from building a good vegetable base rather than adding lots of extra ingredients.

Allow the onion, carrots and celery to soften gently before adding the tomatoes. Cooking the tomato purée briefly also helps deepen its flavour.

If the soup tastes too sharp, simmer it a little longer and check the seasoning. The carrots provide natural sweetness, so added sugar isn’t usually necessary.

Fresh basil is best stirred in towards the end to preserve its aroma.

How to Make the Soup Thicker or Smoother

For a thicker consistency, simmer the soup uncovered for a few extra minutes before blending.

For a lighter soup, add a small amount of hot vegetable stock or water until you reach your preferred texture.

If you enjoy a particularly smooth finish, blend thoroughly. For a more substantial rustic soup, blend only part of the mixture.

A little milk or cream can be stirred in after blending if desired, although the original recipe doesn’t require either.

Budget-Friendly Tips

Tinned tomatoes, passata and dried herbs are useful ingredients to keep in your cupboard because they work in several family meals.

Compare supermarket own-brand products and choose seasonal carrots and onions where possible.

If you have spare suitable vegetables, small amounts can be added to the base rather than left unused in the fridge.

Preparing a larger batch can also make future lunches easier, provided you cool and store the soup safely.

What to Serve with Tomato and Basil Soup

For a simple lunch, serve with wholemeal toast or crusty bread.

To make it more filling, pair it with a cheese sandwich, a baked potato or another suitable side.

For a dairy-free meal, choose bread and accompaniments that meet your dietary requirements.

Batch Cooking, Freezing and Reheating

This soup is convenient for making ahead because its tomato and vegetable base reheats well.

Allow the cooked soup to cool promptly, divide it into suitable portions and refrigerate within two hours.

Eat refrigerated leftovers within 48 hours or freeze in airtight, freezer-safe containers. Leave enough room for the soup to expand as it freezes.

Defrost frozen portions safely in the fridge, then reheat until steaming hot throughout. Reheat each portion only once.

If the soup thickens during storage, stir in a splash of water while reheating.

Frequently Asked Questions

Can I make tomato and basil soup without fresh tomatoes?

Yes. This recipe is designed around tinned chopped tomatoes and passata, making it practical throughout the year.

Can I use dried basil instead of fresh?

Yes. Use approximately one teaspoon of dried basil, adjusting to taste.

Do I need to add cream?

No. Blending the softened vegetables creates a satisfying texture without cream. A little cream or milk is entirely optional.

Can I freeze homemade tomato soup?

Yes. Cool it promptly and freeze in suitable portion-sized containers. Defrost and reheat thoroughly before serving.

Why does my tomato soup taste acidic?

Tomato varieties differ in acidity. Cooking the vegetable base gently and allowing the soup to simmer can help balance the flavour.

Can I make this soup vegan?

Yes. Use vegan vegetable stock and choose plant-based accompaniments. The main recipe contains no dairy ingredients.

More Affordable Family Meal Ideas

Homemade soup is a practical way to turn inexpensive cupboard ingredients into a comforting meal.

Explore our Budget Family Meals UK guide for more everyday recipe ideas, or organise your weekly menu with the Free UK Family Meal Planner.

Eggplant stuffed with beef and ricotta: a culinary delight

Eggplant stuffed with beef and ricotta: a culinary delight Embark on a culinary adventure with this delicious recipe for eggplant stuffed with beef and ricotta. This dish is a symphony of flavors, combining the richness of ground beef with the creaminess of ricotta cheese, all nestled in tender eggplant halves. ingredients: 1 large eggplant, stem removed and cut in half 250 grams of lean ground beef 1 small onion, finely chopped 1 small carrot, finely chopped 2 cloves of garlic, chopped 2 teaspoons of paprika 1 teaspoon dried oregano ½ teaspoon ground coriander A little chili (optional) 2 tablespoons of tomato paste Half a cup of beef broth 90 grams of ricotta cheese 50 grams of grated mozzarella cheese Cooking spray Salt and black pepper to taste Chopped fresh parsley for garnish  directions: Preheat the oven to 200°C (400°F). Season the eggplant halves with salt and pepper. Generously spray the flesh side of the halved eggplant with cooking spray. Place eggplant halves, flesh side down, on a baking sheet lined with parchment paper. Bake for 30-35 minutes until the eggplants are cooked. While the eggplants are cooking, prepare the filling. Heat a large skillet over medium-high heat. Spray pan with cooking spray. Add onion and cook until soft, about 5 minutes. Add ground beef, carrots, garlic, paprika, oregano, cilantro and chili pepper (if using). Cook the beef with a spatula until browned, about 10 minutes. Add the tomato paste and beef broth. Reduce heat to low and simmer for 10 minutes. Once the eggplant is cooked, remove it from the oven. Using a spoon, carefully scoop out the flesh from the eggplant halves, leaving a thin layer around the edges. Chop the extracted eggplant flesh and add it to the beef mixture. Season the filling with salt and pepper to taste. Stuff each eggplant half with the beef mixture. Top each eggplant half with ricotta and mozzarella cheese. Place the eggplant halves in a baking dish. Cover the dish with foil. Bake it in the oven for 20 minutes. Remove foil and sprinkle with chopped parsley. Bake for another 10 minutes or until the cheese is melted and bubbly. Serve immediately and enjoy! Tips: For a richer flavor, use a combination of ground beef and ground lamb. If you prefer a spicier dish, add more chili pepper to the topping. For a vegetarian version, omit the beef and use cooked quinoa or lentils instead. Garnish with chopped parsley and fresh basil leaves for added flavor and color.

Eggplant stuffed with beef and ricotta: a culinary delight

Eggplant stuffed with beef and ricotta: a culinary delight.  Embark on a culinary adventure with this delicious recipe for eggplant stuffed with beef and ricotta. This dish is a symphony of flavors, combining the richness of ground beef with the creaminess of ricotta cheese, all nestled in tender eggplant halves.

About Time:

  • Prepr Time: 15 min.
  • Cook Time: 1 Hour
  • Total Time: 1 hour 15 mins
  • Yield: 2 Servings

ingredients:

  • 1 large eggplant, stem removed and cut in half
  • 250 grams of lean ground beef
  • 1 small onion, finely chopped
  • 1 small carrot, finely chopped
  • 2 cloves of garlic, chopped
  • 2 teaspoons of paprika
  • 1 teaspoon dried oregano
  • ½ teaspoon ground coriander
  • A little chili (optional)
  • 2 tablespoons of tomato paste
  • Half a cup of beef broth
  • 90 grams of ricotta cheese
  • 50 grams of grated mozzarella cheese
  • Cooking spray
  • Salt and black pepper to taste
  • Chopped fresh parsley for garnish

Go to the next page to get the Instructions

How to make a delicious Brussels Sprouts Gratin

How to make a delicious Brussels Sprouts Gratin

Brussels sprouts are a healthy and versatile vegetable that can be used in a variety of dishes. One of the most popular ways to prepare them is in a gratin. Gratins are a type of dish that is made by baking vegetables in a creamy sauce and topping them with cheese.

This recipe for Brussels Sprouts Gratin is easy to follow and yields a delicious and satisfying dish. The Brussels sprouts are cooked until soft and tender, and the sauce is creamy and flavorful. The grated Parmesan cheese adds a touch of richness , and the chopped bacon adds a salty and smoky flavor.

About Time:

  • Prep Time: 10 mins
  • Cook Time: 35 mins
  • Total Time: 45 mins
  • Yield: 4 Servers
  •  Free

Go to the next page to get the Ingredients

Noodle soup recipe

Noodle soup recipe

Noodle soup is a savory dish consisting of noodles served in a broth, often with various other ingredients such as meat, vegetables, and spices. It is a popular culinary dish found in various cultures around the world, particularly in East Asia, Southeast Asia, and the Himalayan states of South Asia. The specific ingredients and flavors of noodle soup vary depending on the region and cultural tradition

Common ingredients in noodle soup:

  • Noodles: Various types of noodles can be used in noodle soup, including wheat noodles, rice noodles, and egg noodles. The choice of noodle typically depends on the desired texture and flavor of the soup.
  • Broth: The broth is the foundation of noodle soup, providing a warm, savory base for the noodles and other ingredients. Broths can be made from meat, seafood, vegetables, or a combination of these ingredients.
  • Protein: Meats, seafood, or tofu are commonly used as protein sources in noodle soup. Popular choices include beef, chicken, pork, shrimp, and tofu.
  • Vegetables: Vegetables provide nutritional value and enhance the flavor and texture of noodle soup. Common vegetables used include carrots, celery, onions, mushrooms, and bok choy.
  • Spices and seasonings: Noodle soup often features a blend of spices and seasonings to create unique flavors. Common spices include ginger, garlic, soy sauce, sesame oil, and chili peppers.

Regional variations of noodle soup:

Noodle soup has a rich history and diverse culinary traditions around the world. Here are some examples of regional variations:

  • Ramen: A Japanese noodle soup typically made with wheat noodles, soy sauce-based broth, and various toppings, such as pork, seaweed, and eggs.
  • Pho: A Vietnamese noodle soup known for its clear broth, made from beef or chicken, and typically served with rice noodles, thinly sliced meat, and fresh herbs.
  • Wonton noodle soup: A Cantonese dish featuring wontons, which are dumplings filled with minced meat or vegetables, served in a broth with noodles and other ingredients.
  • Lanzhou hand-pulled beef noodle soup: A popular Chinese noodle soup known for its chewy hand-pulled noodles, rich beef broth, and tender beef slices.

Noodle soup offers a variety of flavors, textures, and nutritional benefits, making it a versatile and satisfying dish enjoyed by people worldwide. Whether it’s a comforting bowl of ramen, the refreshing aroma of pho, or the delicate flavors of wonton noodle soup, noodle soup continues to captivate taste buds and nourish bodies across cultures.

Today we are going to prepare a no-sync spicy beef ramen recipe
The post contains additional information and useful tips to ensure the recipe turns out great. Please use the jump to recipe link at the end

This ramen is a spicy delight, with beef, vegetables, and a spicy broth. It’s a perfect meal for a cold day.

Go to the next page to get the Ingredients

Easy Tortilla Quiche with Spinach and Peppers

Delight in a Nutrient-Packed and Easy-to-Make Tortilla Quiche

This easy tortilla quiche combines eggs, spinach, red pepper, and cherry tomatoes in a crisp tortilla crust. It’s a simple alternative to pastry quiche, with no dough to roll out and no cream required.

Enjoy it warm for breakfast, serve it for brunch, or add a green salad for a light lunch.

Recipe Details

  • Prep time: Approximately 15 minutes
  • Cook time: 25–30 minutes
  • Resting time: 5 minutes
  • Servings: 2
  • Oven temperature: 180°C (350°F), conventional oven

Ingredients

  • 4 large eggs
  • 1 large whole-wheat tortilla, wide enough to line the base and sides of your dish
  • 1 red bell pepper, diced
  • 1 small onion, finely diced
  • 2 cups fresh spinach, roughly chopped
  • 4–6 cherry tomatoes, halved
  • Salt and freshly ground black pepper, to taste
  • 1 teaspoon olive oil, divided between greasing the dish and cooking the vegetables

How to Make Tortilla Quiche

1. Prepare the Dish

Preheat the oven to 180°C (350°F). Lightly grease a small, deep ovenproof dish, approximately 6 inches (15 cm) across, using a little of the measured oil.

Press the tortilla gently into the dish so it covers the base and reaches up the sides. The edges should sit above the filling to help contain the eggs.

2. Cook the Vegetables

Heat the remaining oil in a non-stick skillet over medium heat. Add the onion and bell pepper and cook for 5–7 minutes, stirring occasionally, until softened.

Add the spinach and cook until wilted. Continue cooking briefly to let excess moisture evaporate, then remove from the heat.

3. Whisk the Eggs

Crack the eggs into a mixing bowl. Season with salt and black pepper, then whisk gently until the yolks and whites are combined.

4. Assemble the Quiche

Spread the cooked vegetables inside the tortilla shell. Pour the eggs over the vegetables, keeping the filling below the tortilla rim. Arrange the cherry tomato halves on top.

If your dish cannot hold all the filling, bake the extra mixture separately in a greased ramekin.

5. Bake

Bake for 25–30 minutes, checking from 20 minutes, until the eggs are set in the centre and the exposed tortilla edges are golden.

If the edges brown too quickly, cover them loosely with foil while the filling finishes cooking. Baking time will vary with the depth of your dish.

6. Rest and Serve

Let the quiche rest for 5 minutes before slicing. Serve warm on its own or with a fresh salad.

Tips for the Best Tortilla Quiche

  • Choose a tortilla that fits. It needs to cover both the bottom and sides of the dish.
  • Use a deep dish. A flat baking sheet will not contain the egg filling.
  • Cook off excess moisture. Wet vegetables can leave the base soggy.
  • Avoid overfilling. Keep the egg mixture below the tortilla’s upper edge.
  • Check the centre. The eggs should be set before you remove the quiche from the oven.

Simple Variations

  • Add cheese: Sprinkle a little grated cheddar or crumbled feta over the filling before baking.
  • Change the vegetables: Try cooked mushrooms, broccoli, or courgette, draining off any excess moisture.
  • Add fresh herbs: Stir chopped chives or parsley into the eggs for extra flavour.

Frequently Asked Questions

Can I use a regular flour tortilla?

Yes. A plain flour tortilla works too. Choose one large enough to line your baking dish without tearing.

Can I use frozen spinach?

Yes. Thaw it completely and squeeze out excess water before adding it to the cooked onion and pepper.

Does this tortilla quiche need milk or cream?

No. This version uses eggs without milk or cream, giving it a firmer texture than a traditional custard-based quiche.

Why is my tortilla quiche soggy?

Excess moisture from the vegetables is a common cause. Cook the vegetables first, let any liquid evaporate, and bake until the egg filling is set.


How making brownies

How making Slimming World brownies This recipe is a delicious and healthy brownie that can be enjoyed by anyone who is following a Slimming World plan. It is made with sweet potatoes, dates, and oats, and it is sweetened with a natural sweetener. The brownies are topped with fresh raspberries and dusted with icing sugar. About Time: Prep Time: 15 mins Cook Time: 1 hour plus 45 mins cooling Total Time: 1 hour plus 55 minutes cooling Yield: makes 6 Slimming World: 5 Syns each Ingredients: 2 large sweet potatoes (about 500g), peeled and diced 100g plain porridge oats 3 tablespoons of sweetener 1 medium egg 12 dried Medjool dates, roughly chopped 2 tablespoons of low-fat spread 6 tablespoons of cocoa powder 16 raspberries 1 teaspoon of icing sugar. Instructions: Preheat the oven to 180°C (fan 160°C, gas 4). Line an 18cm square loose-bottomed cake tin with baking paper. Steam the sweet potatoes for 10 minutes, or until tender (use a steamer or put them in a covered colander placed over a saucepan of boiling water and steam over a high heat). Leave to cool slightly. Put the oats in a food processor and blend until you have fine crumbs. Add the sweetener, egg, dates, spread, cocoa powder, sweet potatoes, and a pinch of salt. Blend until smooth. Pour the mixture into the prepared tin and level the surface. Carefully place the raspberries on top of the brownie mixture, ensuring that each brownie square will have one raspberry. Bake for 35 minutes, or until cooked through. Allow to cool in the tin. Turn the brownie out onto a board, then carefully peel away and discard the baking paper. Cut the brownie into 16 squares and dust each square with ½ tablespoon of icing sugar. These brownies are delicious and satisfying, and they are a great way to satisfy your sweet tooth while still staying on track with your Slimming World goals. These brownies are a delicious and satisfying treat that you can enjoy without feeling guilty. They are also a great way to get your daily dose of fruit with the addition of raspberries. Tips for making Slimming World brownies: Use unsweetened cocoa powder for a healthier brownie. Add more raspberries for a fruitier brownie. You can also use other fruits, such as chopped apples or strawberries. If you prefer a fudgy brownie, bake for 30 minutes. For a more cakey brownie, bake for 40 minutes. Enjoy your delicious and healthy Slimming brownies! mynrecipes.com

How making brownies

This recipe is a delicious and healthy brownie that can be enjoyed by anyone who is following a diet plan. It is made with sweet potatoes, dates, and oats, and it is sweetened with a natural sweetener. The brownies are topped with fresh raspberries and dusted with icing sugar.

About Time:

  • Prep Time: 15 mins
  • Cook Time: 1 hour plus 45 mins cooling
  • Total Time: 1 hour plus 55 minutes cooling
  • Yield: makes 6

Go to the next page to get the ingredients

Healthy Apple Betty with Cinnamon and Sultanas

Healthy Apple Betty with Cinnamon & Sultanas

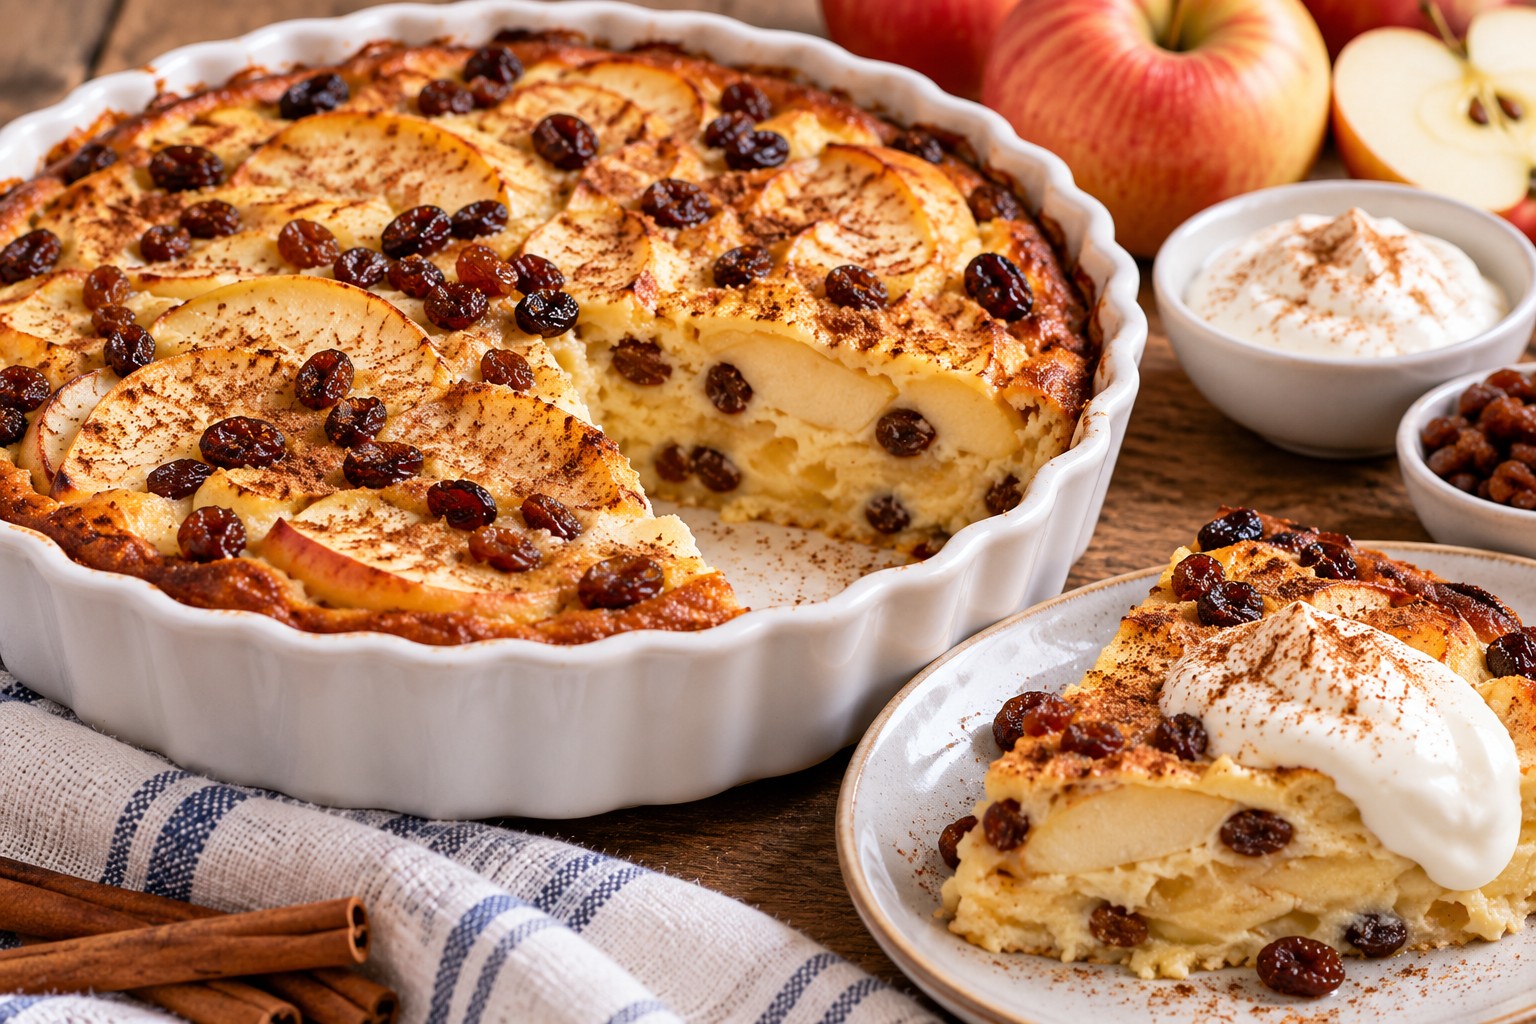
This easy apple betty combines tender baked apples, sweet sultanas and a lightly spiced yoghurt and egg custard. Made with familiar supermarket ingredients, it is a comforting, budget-friendly dessert that can be served warm with a spoonful of fromage frais.

It is also a useful way to enjoy apples that need using up. The recipe serves six and requires just 15 minutes of preparation before going into the oven.

Recipe Details

  • Servings: 6
  • Preparation time: 15 minutes
  • Cooking time: Approximately 30–40 minutes
  • Total time: Approximately 45–55 minutes
  • Equipment: 20cm ovenproof flan dish

Ingredients

  • 2 large eating apples, peeled, cored and thinly sliced
  • ½ cup sultanas or raisins (approximately 75g)
  • 8 large eggs
  • 4 level tbsp granulated sweetener suitable for baking, or to taste
  • 2 tsp vanilla extract
  • 80g fat-free natural yoghurt
  • ½ tsp ground cinnamon
  • Fat-free natural fromage frais, to serve (optional)

How to Make Healthy Apple Betty

1. Prepare the oven and dish

Preheat the oven to 190°C (170°C fan), gas mark 5. Lightly grease a 20cm ovenproof flan dish if needed.

2. Arrange the fruit

Spread the apple slices evenly across the base of the dish. Scatter most of the sultanas over the apples, reserving a small amount for the topping.

3. Prepare the custard mixture

In a large mixing bowl, whisk together the eggs, granulated sweetener and vanilla extract. Add the natural yoghurt and whisk until combined.

4. Assemble the dessert

Pour the egg mixture carefully over the apples and sultanas, allowing it to settle between the fruit slices. Scatter the remaining sultanas over the top and sprinkle with cinnamon.

5. Bake until set

Bake for approximately 30–40 minutes, until the centre is set and the top is lightly golden. If the top begins to brown too quickly, cover loosely with foil.

The exact baking time will depend on the depth of your dish and your oven. The egg mixture should be thoroughly cooked.

6. Serve

Allow the apple betty to stand for a few minutes before dividing it into six portions. Serve warm with a spoonful of fromage frais, if desired.

Tips and Variations

  • Choose the right apples: Sweet eating apples work well, but slightly tart varieties can provide a pleasant contrast to the sultanas.
  • Adjust the sweetness: Check the packaging of your chosen sweetener, as sweetness and suitability for baking vary between products.
  • Use what you have: Replace some of the sultanas with raisins or add a little extra cinnamon.
  • Avoid overbaking: Check the dessert towards the end of the cooking time to prevent the custard from becoming dry.
  • Make individual portions: Divide the mixture between smaller ovenproof dishes and adjust the cooking time accordingly.

Storage

Allow leftovers to cool, then cover and refrigerate within two hours. Eat within 48 hours. Keep chilled until serving and avoid leaving the egg-based dessert at room temperature for extended periods.

More Budget-Friendly Recipe Ideas

For more affordable family meals and everyday cooking inspiration, explore our Budget Family Meals UK guide and Healthy High-Protein & Fibre-Rich Recipes collection.

Allergen note: Contains eggs and milk. Check the labels of your yoghurt, sweetener and serving accompaniments.

Crispy Chicken Nuggets with a Wholesome Twist

Crispy Chicken Nuggets with a Wholesome Twist Indulge in a guilt-free treat with these baked chicken nuggets, crafted with wholesome wholemeal bread crumbs and a touch of mustard powder and dried mixed herbs. They're perfect for satisfying cravings without compromising on flavor or nutrition. About Time: Prep Time: 15 mins Cook Time: 40 mins Total Time: 55 mins Yield: Serves 4 Slimming World: 1½ Syns per serving Ingredients: Low-calorie cooking spray 60g wholemeal bread roll, torn into pieces 1 tsp mustard powder 2 tsp dried mixed herbs 2 large eggs 4 skinless, boneless chicken breasts, thinly sliced Instructions: Preheat your oven to 200°C (fan 180°C/gas 6). Line a baking sheet with non-stick baking parchment and spray with low-calorie cooking spray. In a food processor, blend the torn bread roll into fine crumbs. Transfer the crumbs to a shallow bowl and stir in the mustard powder and dried mixed herbs. In a separate shallow bowl, lightly beat the eggs. Dip each chicken slice into the beaten egg, then thoroughly coat in the breadcrumb mixture. Arrange the coated nuggets on the prepared baking sheet. Bake for 20-25 minutes, or until the chicken is cooked through and the breadcrumbs are golden brown and crispy. Serve the hot chicken nuggets with Slimming World chips, baked beans, and a crisp salad for a complete and satisfying meal. Tips: For extra flavor, add a pinch of grated Parmesan cheese to the breadcrumb mixture. To ensure even cooking, arrange the chicken nuggets in a single layer on the baking sheet. If you don't have a food processor, you can simply chop the bread roll into fine crumbs using a knife. Enjoy these delicious and nutritious chicken nuggets whenever the craving strikes! Elevate your culinary experience by transforming this oven-baked chicken nugget recipe into an air fryer-powered masterpiece. Indulge in the crisp, golden goodness of homemade nuggets without the hassle or mess of deep frying. Here's how to adapt the recipe for the air fryer: Ingredients: Low-calorie cooking spray 60g wholemeal roll, torn into pieces 1 tsp mustard powder 2 tsp dried mixed herbs 2 eggs 4 skinless and boneless chicken breasts, thinly sliced Instructions: Preheat your air fryer to 400°F (200°C). Follow steps 2 and 3 of the oven-baked recipe to create the breadcrumb mixture. Spray the air fryer basket with low-calorie cooking spray. Dip the thinly sliced chicken breasts in the beaten eggs, ensuring they are fully coated. Generously coat the coated chicken pieces in the breadcrumb mixture until evenly coated. Arrange the breaded chicken nuggets in a single layer in the air fryer basket, ensuring they do not touch. Air fry for 10-12 minutes, or until the chicken is cooked through and the breadcrumbs are golden brown. Serve hot with your favorite dipping sauces. Enjoy the healthier, air-fried version of this classic comfort food while maintaining the irresistible taste and texture

Crispy Chicken Nuggets with a Wholesome Twist

Indulge in a guilt-free treat with these baked chicken nuggets, crafted with wholesome wholemeal bread crumbs and a touch of mustard powder and dried mixed herbs. They’re perfect for satisfying cravings without compromising on flavor or nutrition.

About Time:

  • Prep Time: 15 mins
  • Cook Time: 40 mins
  • Total Time: 55 mins
  • Yield: Serves 4

Ingredients:

  • Low-calorie cooking spray
  • 60g wholemeal bread roll, torn into pieces
  • 1 tsp mustard powder
  • 2 tsp dried mixed herbs
  • 2 large eggs
  • 4 skinless, boneless chicken breasts, thinly sliced

Instructions:

  1. Preheat your oven to 200°C (fan 180°C/gas 6). Line a baking sheet with non-stick baking parchment and spray with low-calorie cooking spray.
  2. In a food processor, blend the torn bread roll into fine crumbs. Transfer the crumbs to a shallow bowl and stir in the mustard powder and dried mixed herbs.
  3. In a separate shallow bowl, lightly beat the eggs.
  4. Dip each chicken slice into the beaten egg, then thoroughly coat in the breadcrumb mixture. Arrange the coated nuggets on the prepared baking sheet.
  5. Bake for 20-25 minutes, or until the chicken is cooked through and the breadcrumbs are golden brown and crispy.
  6. Serve the hot chicken nuggets with diet chips, baked beans, and a crisp salad for a complete and satisfying meal.

Tips:

  • For extra flavor, add a pinch of grated Parmesan cheese to the breadcrumb mixture.
  • To ensure even cooking, arrange the chicken nuggets in a single layer on the baking sheet.
  • If you don’t have a food processor, you can simply chop the bread roll into fine crumbs using a knife.
  • Enjoy these delicious and nutritious chicken nuggets whenever the craving strikes!

Elevate your culinary experience by transforming this oven-baked chicken nugget recipe into an air fryer-powered masterpiece. Indulge in the crisp, golden goodness of homemade nuggets without the hassle or mess of deep frying.

Here’s how to adapt the recipe for the air fryer:

Ingredients:

  • Low-calorie cooking spray
  • 60g wholemeal roll, torn into pieces
  • 1 tsp mustard powder
  • 2 tsp dried mixed herbs
  • 2 eggs
  • 4 skinless and boneless chicken breasts, thinly sliced

Instructions:

  1. Preheat your air fryer to 400°F (200°C).
  2. Follow steps 2 and 3 of the oven-baked recipe to create the breadcrumb mixture.
  3. Spray the air fryer basket with low-calorie cooking spray.
  4. Dip the thinly sliced chicken breasts in the beaten eggs, ensuring they are fully coated.
  5. Generously coat the coated chicken pieces in the breadcrumb mixture until evenly coated.
  6. Arrange the breaded chicken nuggets in a single layer in the air fryer basket, ensuring they do not touch.
  7. Air fry for 10-12 minutes, or until the chicken is cooked through and the breadcrumbs are golden brown.
  8. Serve hot with your favorite dipping sauces.
  9. Enjoy the healthier, air-fried version of this classic comfort food while maintaining the irresistible taste and texture