Easy Chicken and Vegetable Soup โ€“ Budget-Friendly Family Recipe

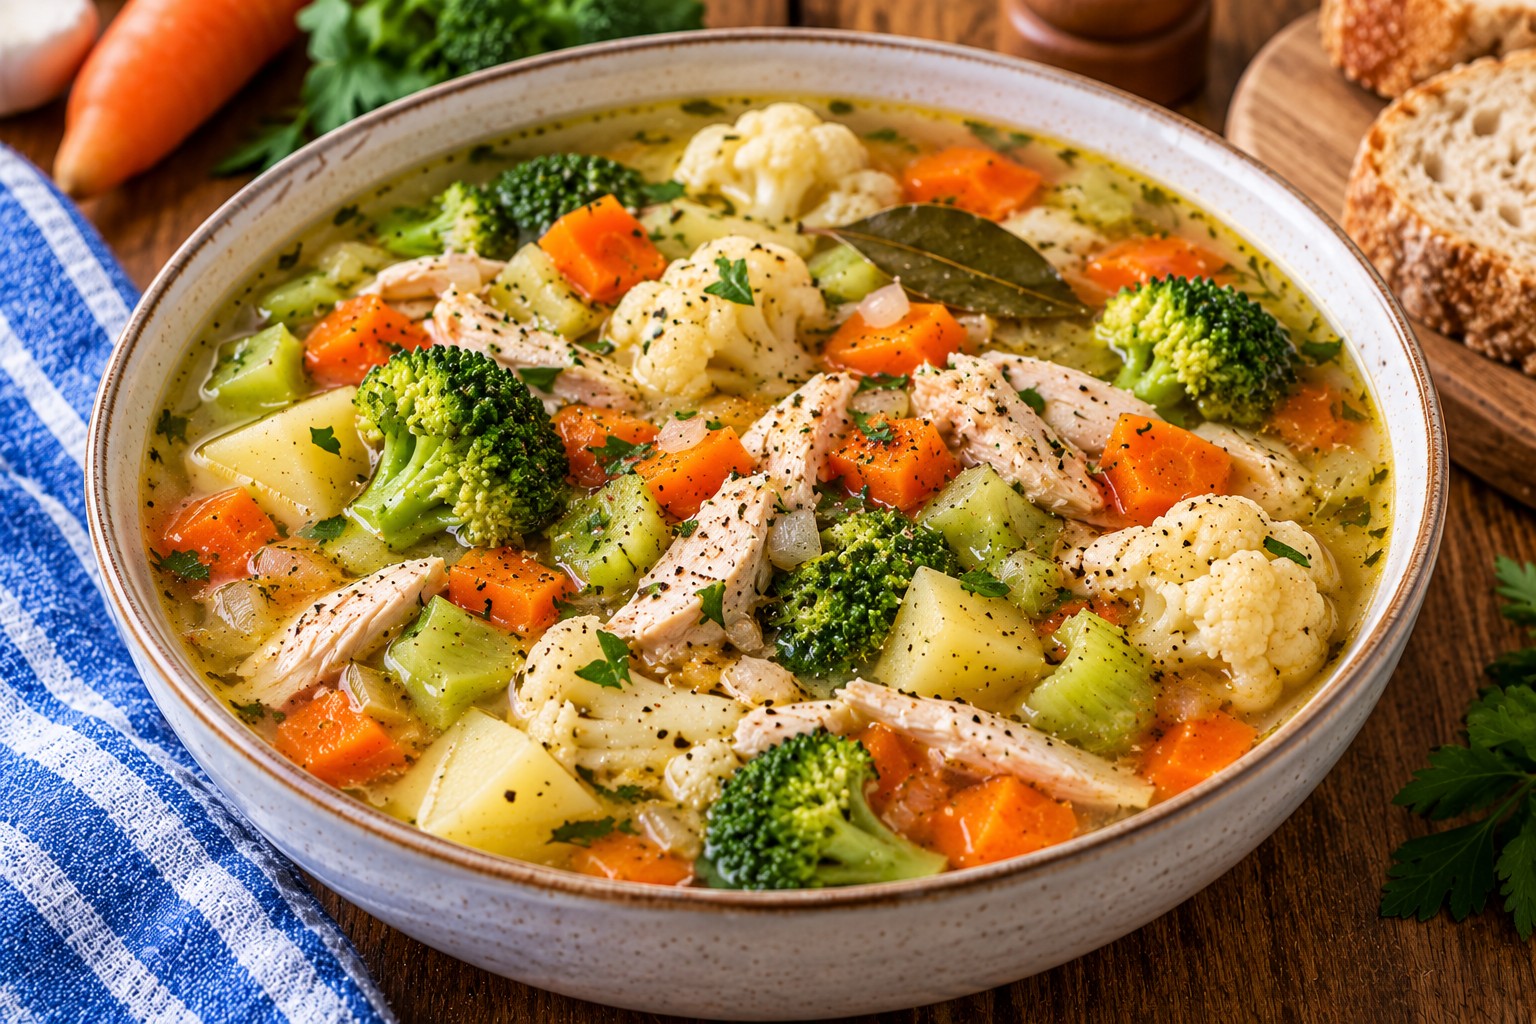
Homemade chicken and vegetable soup with shredded chicken, potatoes, carrots, cauliflower and broccoli in a light broth.

Turn leftover cooked chicken into a comforting family meal with this easy chicken and vegetable soup. Made with tender chicken, potatoes, carrots, cauliflower and broccoli in a fragrant broth, it’s a practical way to prepare a filling dinner without buying lots of extra ingredients.

This one-pot recipe uses just one cooked chicken breast to make approximately four portions. Rosemary, garlic and a bay leaf add flavour to the stock, while everyday vegetables give the soup colour and texture.

It’s particularly useful after a Sunday roast or whenever you have leftover cooked chicken in the fridge.

Why This Chicken and Vegetable Soup Works

  • Makes leftover cooked chicken go further.
  • Uses affordable, familiar supermarket vegetables.
  • Requires just one large saucepan.
  • Easy to adapt with frozen cauliflower or broccoli.
  • Suitable for lunch, a light dinner or preparing meals ahead.

Recipe at a Glance

Details Information
Servings Approximately 4
Preparation time 10 minutes
Cooking time 25โ€“30 minutes
Total time 35โ€“40 minutes
Cooking method One-pot, hob
Course Lunch or light dinner

Ingredients

  • 2 large onions, roughly chopped
  • 1 celery stalk, chopped
  • 200g cauliflower, cut into small florets
  • 1 large potato, peeled and diced
  • 1 large carrot, peeled and diced
  • 3 garlic cloves, peeled and lightly crushed
  • 1 sprig fresh rosemary
  • 1 bay leaf
  • 1 litre hot chicken stock
  • 150g broccoli, cut into small florets
  • 1 cooked, skinless and boneless chicken breast, chopped or shredded
  • Freshly ground black pepper
  • Salt, if needed

How to Make Chicken and Vegetable Soup

Step 1: Prepare the Vegetables

Chop the onions and celery, dice the potato and carrot, and divide the cauliflower and broccoli into small florets.

Keeping the potato and carrot pieces relatively small helps them cook evenly.

Step 2: Build the Soup Base

Place the onions, celery, cauliflower, potato, carrot, garlic, rosemary and bay leaf in a large saucepan.

Pour over the hot chicken stock and bring to the boil.

Reduce the heat, cover and simmer gently for approximately 15โ€“20 minutes, until the root vegetables are nearly tender.

Step 3: Add the Broccoli

Stir in the broccoli florets and continue simmering for approximately five minutes.

The broccoli should become tender without losing all its texture.

Step 4: Add the Cooked Chicken

Add the chopped or shredded cooked chicken.

Simmer for another five minutes, or until the chicken is steaming hot throughout and the vegetables are fully tender.

The chicken must already be cooked before being added at this stage.

Step 5: Finish and Serve

Remove the rosemary sprig and bay leaf.

Taste the broth and add black pepper. Add salt only if needed, as chicken stock can already contain a considerable amount.

Ladle into bowls and serve hot.

How to Make the Most of Leftover Chicken

This soup is a useful way to turn a modest amount of leftover roast chicken into another family meal.

Remove the skin and bones, then shred or chop the cooked meat into small pieces. Keep leftovers refrigerated and use them within their safe storage period.

Avoid adding the chicken too early, as it only needs reheating and can become dry if simmered for too long.

Budget-Friendly Vegetable Swaps

Frozen cauliflower and broccoli work well in this recipe and can help reduce food waste.

You can also use spare carrots, potatoes or other suitable vegetables already in your fridge. Adjust the cooking time according to their size.

A chicken stock cube dissolved in hot water is a convenient alternative to ready-made stock.

How to Make the Soup More Filling

The potato adds substance, but you can serve the soup with wholemeal bread or toast for a more substantial dinner.

For a thicker texture, gently mash a few pieces of cooked potato against the side of the saucepan and stir them back into the broth.

Storage and Reheating

Cool the soup promptly and refrigerate within two hours. Eat within 48 hours, provided the cooked chicken is still within its original safe storage period.

Reheat only once until steaming hot throughout. Do not repeatedly cool and reheat the same batch.

Freeze promptly in suitable portion-sized containers if you do not plan to eat it within the safe storage period.

Frequently Asked Questions

Can I use leftover roast chicken?

Yes. Remove the skin and bones, shred the cooked meat and add it towards the end of cooking.

Can I use raw chicken breast?

This particular recipe is written for previously cooked chicken. Raw chicken requires a different cooking stage and must be cooked thoroughly before serving.

Can I use frozen vegetables?

Yes. Frozen cauliflower and broccoli are convenient substitutes. Adjust the cooking time until the vegetables are tender.

Can I make the soup thicker?

Yes. Mash some of the cooked potato into the broth or blend a small portion of the vegetables before adding the chicken.

Can I prepare it ahead?

Yes. Follow safe cooling and refrigeration practices, especially when using chicken that was cooked previously.

More Affordable Family Meal Ideas

Looking for practical ways to turn everyday ingredients into satisfying dinners? Explore our Budget Family Meals UK guide.

Organise your weekly meals and shopping list with our Free UK Family Meal Planner.

Baked Egg Custard with Orange and Berries

Baked Egg Custard with Orange and Berries

This baked egg custard is a comforting, gently spiced dessert with a smooth, creamy texture and a delicate hint of orange. Made with eggs, skimmed milk, vanilla and cinnamon, it is baked slowly in a water bath, then chilled and served with fresh mixed berries.

It is an easy make-ahead dessert for family meals, weekend lunches or whenever you fancy something simple and homemade.

Recipe Details

  • Servings: 4
  • Preparation time: 15 minutes
  • Cooking time: 40โ€“50 minutes
  • Chilling time: At least 3 hours
  • Total time: Approximately 4ยฝ hours, including cooling and chilling

Ingredients

For the custard

  • 4 large eggs
  • 600ml skimmed milk
  • 1 tsp vanilla extract
  • 3 tbsp granulated sweetener suitable for baking, or to taste
  • ยฝ tsp ground cinnamon, divided
  • Finely grated zest of 1 orange
  • A small pinch of ground nutmeg

To serve

  • 200g mixed berries, such as raspberries, blueberries and strawberries
  • 1โ€“2 tbsp freshly squeezed orange juice, optional
  • A little extra orange zest, optional

How to Make Baked Egg Custard

1. Prepare the oven and ramekins

Preheat the oven to 180ยฐC/160ยฐC fan/Gas 4.

Place four ovenproof ramekins, each with a capacity of approximately 200ml, in a deep roasting tin. Put the kettle on to boil.

2. Whisk the eggs

Crack the eggs into a large mixing bowl and whisk gently until combined. Avoid beating too much air into the mixture, as this can create bubbles on the surface of the custard.

3. Warm the milk

Pour the skimmed milk into a saucepan. Add the vanilla extract, granulated sweetener, half the cinnamon and most of the orange zest.

Warm over a low heat, stirring occasionally, until steaming but not boiling. Remove from the heat.

4. Combine the custard

Gradually pour the warm milk into the eggs, whisking continuously. Adding it slowly helps prevent the eggs from cooking too quickly.

Strain the mixture through a fine sieve into a pouring jug to remove any small lumps and create a smoother texture.

5. Fill the ramekins

Divide the custard mixture evenly between the four ramekins. Sprinkle each with a little nutmeg.

Carefully pour hot water into the roasting tin until it reaches approximately halfway up the sides of the ramekins. Take care not to splash water into the custard.

6. Bake gently

Transfer the roasting tin to the oven and bake for 40โ€“50 minutes, checking from 35 minutes onwards. The custards are ready when the edges are set but the centres still have a gentle wobble.

The exact cooking time will depend on the size and depth of your ramekins. Avoid baking until completely firm, as the custard will continue to set as it cools.

7. Cool and chill

Carefully lift the ramekins out of the water bath and leave to cool. Once no longer warm, cover and refrigerate for at least 3 hours.

8. Serve with berries

If using the orange juice, gently toss it with the mixed berries just before serving.

Top each chilled custard with berries, the remaining cinnamon and a little reserved orange zest.

Tips for a Smooth Baked Egg Custard

  • Use gentle heat. Warm the milk without boiling it, and add it gradually to the eggs.
  • Strain the mixture. This removes any small pieces of cooked egg and gives the custard a finer texture.
  • Do not skip the water bath. It provides gentler, more even heat and reduces the risk of a grainy texture.
  • Look for a slight wobble. The centre should move gently when the ramekin is nudged, rather than appearing liquid.
  • Allow enough chilling time. The custards become firmer as they cool.

Easy Flavour Variations

Vanilla and nutmeg: Leave out the orange zest and cinnamon for a more traditional baked egg custard.

Cardamom and orange: Replace the cinnamon with a small pinch of ground cardamom.

Summer berries: Serve with raspberries, strawberries or blueberries, depending on what is in season.

A little crunch: Sprinkle chopped toasted almonds over the custard just before serving, if preferred.

Can You Make Baked Egg Custard Ahead?

Yes. Prepare the custards the day before, allow them to cool and store them covered in the fridge. Keep the berries separate until serving so they stay fresh.

How to Store Baked Egg Custard

Cover the cooled custards and refrigerate promptly. Store at 5ยฐC or below and enjoy within 2โ€“3 days.

Keep any prepared fruit separately and add it just before serving. Freezing is not recommended, as thawing can spoil the smooth texture.

Frequently Asked Questions

Why has my baked egg custard turned watery?

Custard can become watery or grainy if it is cooked at too high a temperature or left in the oven for too long. A water bath and gentle baking help prevent this.

Can I use semi-skimmed milk?

Yes. Semi-skimmed milk can be used instead of skimmed milk and will produce a slightly richer custard.

Can I serve baked egg custard warm?

Yes. Although this orange and berry version is lovely chilled, you can also enjoy it slightly warm once the custard has set.

How do I know when the custard is cooked?

The edges should be set and the centre should wobble gently. It should not look runny when the ramekin is moved.

More Homemade Desserts to Try

If you enjoy homemade desserts, you might also like our Apple Betty for a comforting fruit pudding, or our Mini Egg Cheesecake for a more indulgent treat.

A Simple Make-Ahead Dessert

With its delicate orange flavour, warming spices and fresh berry topping, this baked egg custard is a lovely way to finish a family meal. Prepare it in advance and keep it chilled until you are ready to serve.

Explore More Recipes on MyNRecipes

For more affordable ย family meals and everyday cooking inspiration, explore our Budget Family Meals UK guide and Healthy High-Protein & Fibre-Rich Recipes collection.

Allergen note: Contains eggs and milk. Check the labels of your chosen sweetener and any additional toppings for other allergens.

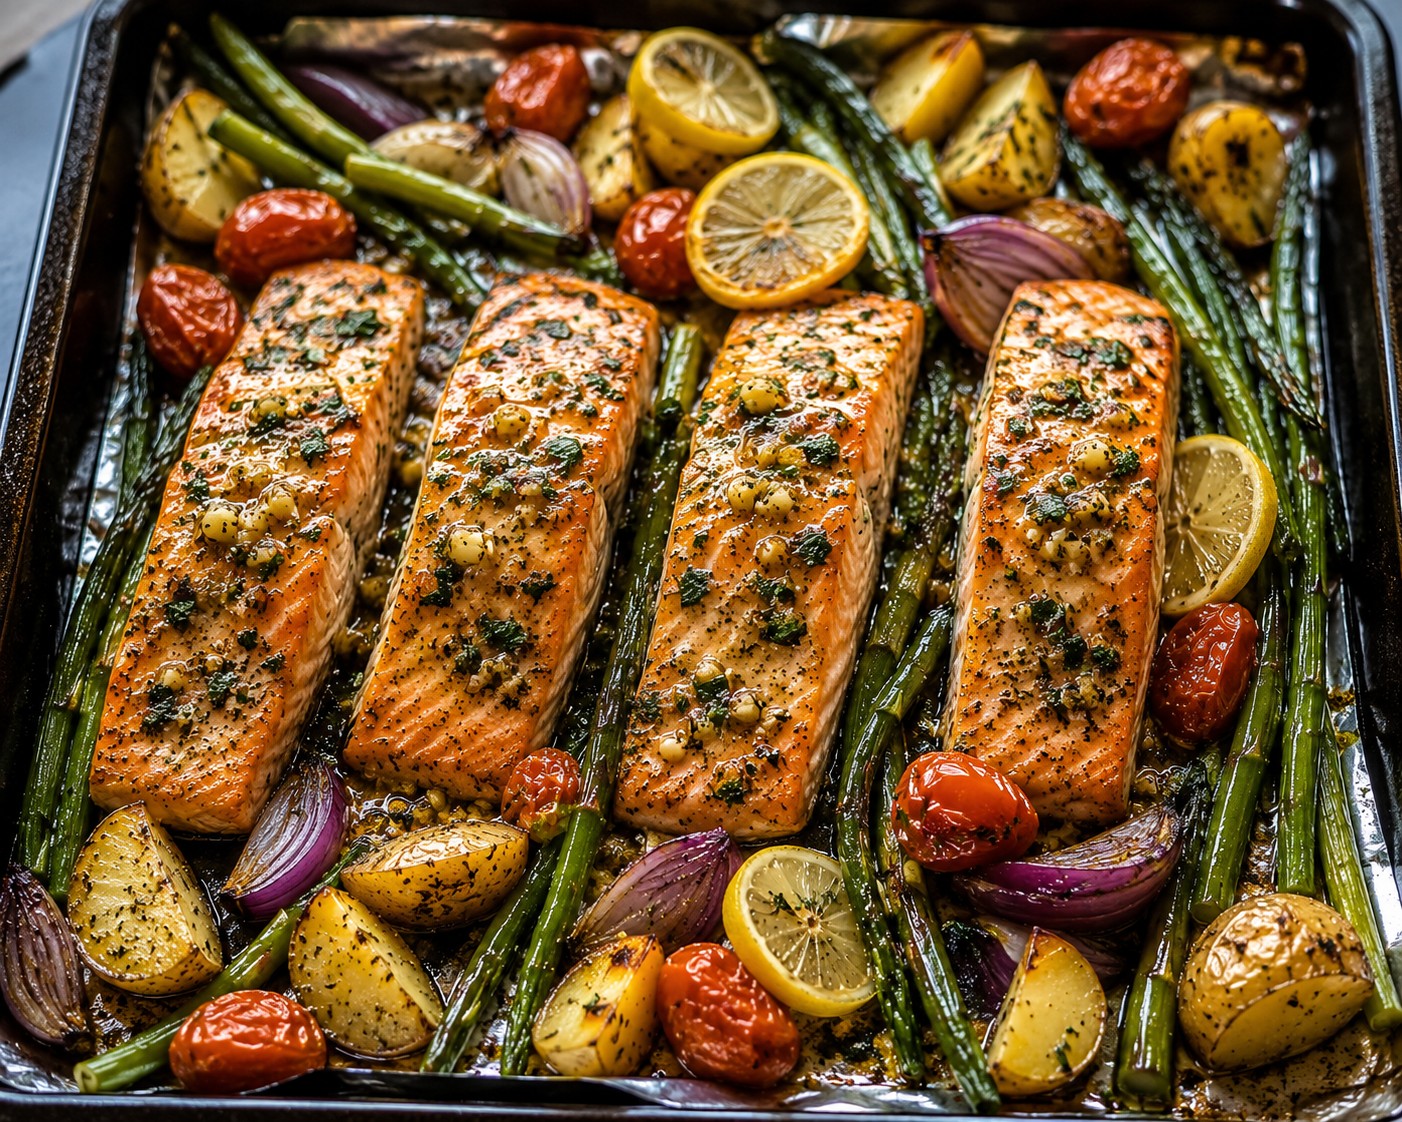
One-Pan Garlic Herb Salmon & Veggies

One-Pan Garlic Herb Salmon & Veggies

One-Pan Garlic Herb Salmon & Veggies

This simple and delicious one-pan recipe features juicy salmon fillets roasted alongside tender potatoes, vibrant cherry tomatoes, and crisp green beans. Topped with a refreshing and light herb sauce, it’s a healthy and flavorful meal that’s perfect for a weeknight dinner.

Time:

  • Prep Time: 10 minutes
  • Cook Time: 35-45 minutes
  • Yield: 2 servings

Ingredients:

  • 1 lb baby new potatoes
  • Cooking spray
  • 2 (6-oz) skinless, boneless salmon fillets
  • 1 cup cherry tomatoes, halved
  • 1 cup green beans, trimmed
  • For the Green Sauce:
  • 1/4 cup watercress
  • 1/4 cup baby spinach
  • 4 tbsp fat-free crรจme fraรฎche
  • Zest and juice of 1 lemon

Instructions:

  • Preheat oven: Preheat oven to 425ยฐF (220ยฐC).
  • Roast potatoes: Place potatoes in a large roasting pan. Season lightly with salt and pepper, spray with cooking spray, and roast for 20-25 minutes, or until tender.
  • Partially crush potatoes: Gently press down on the potatoes with the back of a fork or the bottom of a glass to slightly crush them.
  • Add salmon and veggies: Add salmon fillets, cherry tomatoes, and green beans to the roasting pan. Spray with cooking spray and return to oven.
  • Roast salmon and veggies: Roast for 10-15 minutes, or until salmon is cooked through and vegetables are tender-crisp.
  • Make the sauce: While salmon and veggies roast, combine watercress, spinach, crรจme fraรฎche, lemon zest, and lemon juice in a blender or food processor. Blend until smooth. Season with salt and pepper to taste.
  • Serve: Divide salmon and vegetables between plates. Drizzle with the green sauce and serve immediately. Enjoy hot or cold.

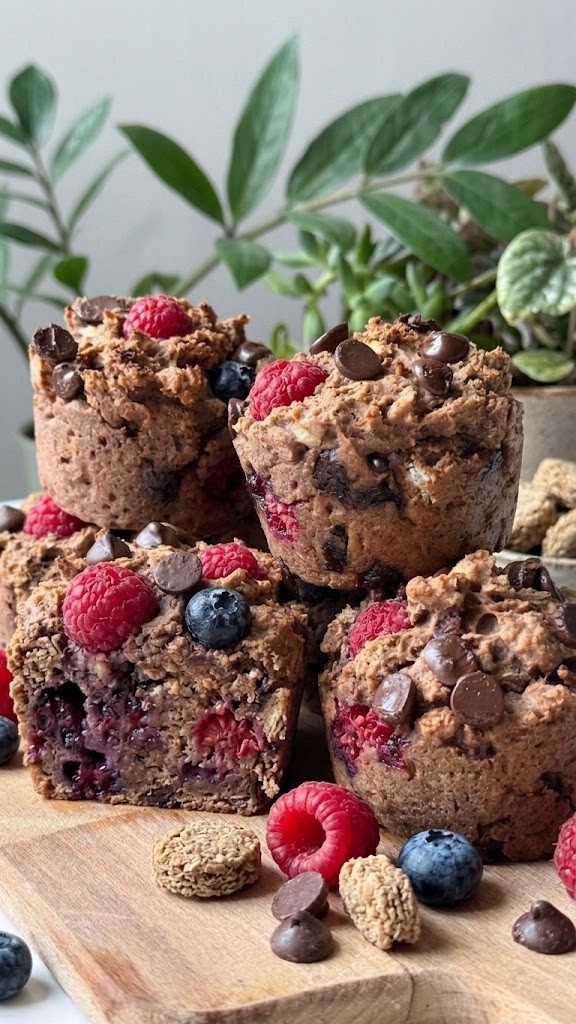
High-Protein Chocolate Berry Breakfast Muffins (Healthy Meal Prep)

Chocolate Berry Breakfast Muffins

These quick, high-protein chocolate berry breakfast muffins are the ultimate healthy meal-prep solution for busy mornings. Made with fiber-rich whole-grain wheat bisks, eggs, and fresh berries, this easy low-calorie recipe gives you a sweet morning treat without refined flour or added oils.

  • Prep time: 5 minutes

  • Cook time: 15 minutes

  • Total time: 20 minutes

  • Servings: 5 muffins

  • Dietary Info: High-Protein, High-Fiber, Low-Calorie, Vegetarian

Ingredients

  • 2 whole-wheat cocoa cereal bisks, finely crushed

  • 3 large eggs

  • 2 tsp vanilla extract

  • 1 sachet (approx. 11g) low-calorie hot chocolate powder

  • 50g fresh blueberries

  • 50g fresh raspberries

Step-by-Step Instructions

  1. Preheat & Prep: Heat your oven to 180ยฐC (160ยฐC fan / 350ยฐF). Arrange 5 silicone muffin cups in a standard muffin pan.

  2. Combine Base: Add the crushed wheat bisks, eggs, vanilla extract, and low-calorie hot chocolate powder into a medium mixing bowl.

  3. Blend Batter: Using an electric hand mixer, whisk on medium speed until the mixture forms a smooth, cohesive batter.

  4. Fold in Berries: Gently fold in the fresh blueberries and raspberries with a spatula, leaving the berries whole to create juicy fruit pockets.

  5. Portion: Spoon the batter evenly into the 5 silicone muffin cups.

  6. Bake: Bake for 12 to 15 minutes until set. Check readiness by inserting a toothpick into the center; it should come out clean.

  7. Cool & Serve: Allow the muffins to cool in the pan for 5 minutes, then transfer them to a wire rack to finish cooling.

Storage & Meal Prep Tips

  • Refrigeration: Store cooled muffins in an airtight container in the fridge for up to 4 days.

  • Freezing: Wrap individual muffins in parchment paper and store in a freezer-safe bag for up to 1 month. Reheat in the microwave for 20-30 seconds.

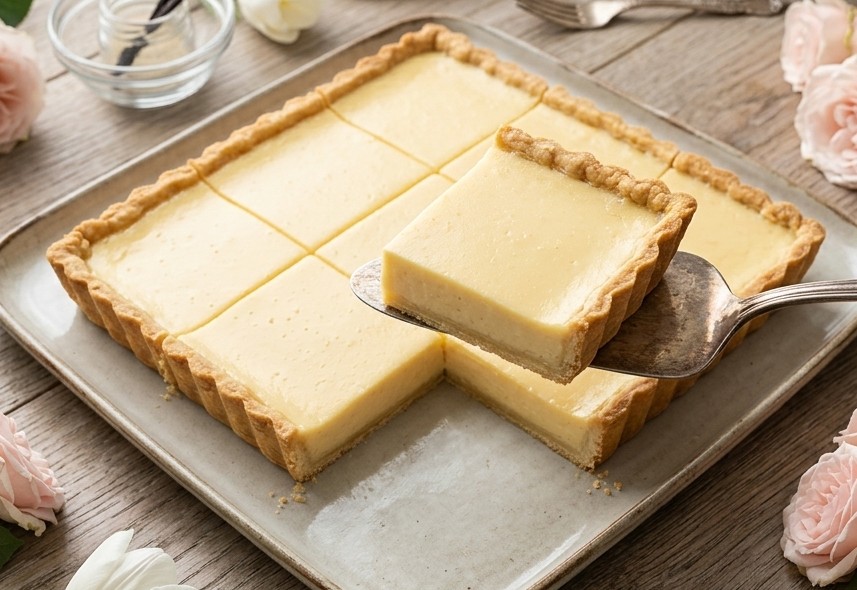
Classic Square Custard Tart (Crostata alla Crema)

Classic Square Custard Tart (Crostata alla Crema)

Classic Square Custard Tart (Crostata alla Crema)

This gorgeous, thick-cut dessert is a Square Custard Tart (often referred to in European baking as a Crostata alla Crema or a Parisian-style custard tart). It features a tall, crisp, buttery shortcrust pastry shell filled to the brim with a dense, rich vanilla pastry cream that sets perfectly enough to slice into neat squares.

Prep & Cook Details

  • Prep Time: 30 minutes

  • Cook Time: 45 minutes

  • Chilling Time: 2 hours (essential for those clean, sharp slices!)

  • Servings: 9 large square slices

  • Equipment: 8×8 inch (20×20 cm) square tart pan or square springform pan

Ingredients

1. For the Shortcrust Pastry Case

  • 250g All-purpose flour

  • 125g Cold unsalted butter, cubed

  • 80g Powdered sugar (icing sugar)

  • 2 Egg yolks (from large eggs)

  • 1-2 tbsp Ice-cold water

  • A pinch of Salt

2. For the Ultra-Thick Custard Filling

  • 600 ml Whole milk (or half-and-half for extra richness)

  • 6 Large egg yolks

  • 120g Granulated sugar

  • 50g Cornstarch (gives it that firm, sliceable structure)

  • 1 ยฝ tsp Pure vanilla extract or vanilla bean paste

  • 30g Unsalted butter (stirred in at the end for a glossy finish)

Step-by-Step Instructions

Step 1: Make and Blind-Bake the Pastry Case

  1. Combine dry ingredients: In a food processor or a large bowl, mix the flour, powdered sugar, and a pinch of salt.

  2. Cut in the butter: Add the ice-cold, cubed butter. Pulse (or rub with your fingertips) until the mixture looks like fine breadcrumbs.

  3. Bind the dough: Whisk the egg yolks with 1 tablespoon of ice water. Add it to the flour mixture and process just until the dough begins to clump together. If it’s too dry, add the second tablespoon of water.

  4. Chill: Shape the dough into a smooth square disc, wrap it in plastic, and refrigerate for 30 minutes.

  5. Roll and Line: On a lightly floured surface, roll the pastry out to about 3-4mm thickness. Carefully lift it and press it into your square pan, making sure it goes right into the corners and straight up the tall sides. Trim any overhang. Prick the base all over with a fork and freeze the lined pan for 15 minutes.

  6. Blind Bake: Preheat your oven to 350ยฐF (175ยฐC). Line the pastry with parchment paper, fill it to the top with baking weights (or uncooked rice/beans), and bake for 15 minutes. Remove the weights and paper, then bake for another 10 minutes until the base is dry and lightly golden. Set aside to cool completely.

Step 2: Cook the Sliceable Custard Filling

  1. Heat the milk: In a saucepan, heat the whole milk and vanilla over medium heat until it just begins to simmer. Remove from heat.

  2. Whisk the base: In a medium bowl, vigorously whisk the 6 egg yolks, granulated sugar, and cornstarch together until pale and smooth.

  3. Temper the eggs: To prevent scrambling, slowly drizzle about a cup of the hot milk into the egg mixture while whisking constantly.

  4. Thicken on the stove: Pour the tempered egg mixture back into the saucepan with the remaining milk. Cook over medium-low heat, whisking continuously and energetically.

  5. The Magic Step: As soon as it bubbles, it will suddenly become incredibly thick. Keep whisking on the heat for 1 full minute to cook out the floury taste of the cornstarch.

  6. Finish: Remove from heat and stir in the 30g of butter until melted and glossy.

Step 3: Assemble, Set, and Slice

  1. Fill the shell: While the custard is still warm, pour it directly into your cooled, baked shortcrust pastry shell. Smooth the top perfectly flat with a spatula (exactly like the smooth surface in the photo).

  2. Prevent a skin: Press a sheet of plastic wrap directly onto the surface of the hot custard. Let it cool to room temperature.

  3. Chill completely: Transfer the tart to the refrigerator and chill for at least 2 to 3 hours (or overnight). The custard must be cold to hold its structure.

  4. Slice: Once fully set, gently remove it from the pan. Use a long, sharp knife dipped in hot water (and wiped dry) to slice it into perfect, clean squares.

๐Ÿ’ก Pastry Chef Secret for Visual Perfection:

To get the gorgeous two-toned look in the photo, your shortcrust pastry edges should bake to a deep golden brown, while the custard center stays a clean, solid, pastel cream-yellow. If you notice your pastry edges browning too fast during step 1, loosely tent the edges with aluminum foil!

ChatGPT Guide for Beginners: How to Use It Effectively

use ChatGPT effectively

๐Ÿค– ChatGPT Guide for Beginners: How to Use It Effectively

Artificial Intelligence is no longer just for tech experts. Today, tools like ChatGPT allow anyone to have a powerful AI assistant right at their fingertips. Whether you are a student, a freelancer, or just curious, learning how to use ChatGPT can change the way you work and learn.

In this simple guide, you will discover exactly how to start with ChatGPT and use it effectively to save hours of work every day.


๐Ÿš€ What is ChatGPT?

ChatGPT is an AI-powered conversational agent developed by OpenAI. Think of it as a highly knowledgeable assistant that can understand human language, answer complex questions, write content, and solve problems in seconds.

The best part? It is completely free to start using.


๐Ÿ› ๏ธ How to Use ChatGPT (Step-by-Step)

Using ChatGPT is as simple as sending a text message to a friend. Here is how to get the most out of it:

1. Be Specific with Your Questions

If you ask a vague question, you will get a vague answer. Instead of asking: “Write an email,” try being more specific: “Write a professional email to my boss asking for a two-day leave next week.”

2. Give the AI a Role (Act As…)

You can tell ChatGPT how to behave. This is a powerful trick. For example:

  • “Act as an expert English teacher and correct my grammar mistakes.”

  • “Act as a social media manager and create 3 Instagram post ideas for a coffee shop.”

3. Ask for Formats

ChatGPT can organize information however you like. You can ask it to provide answers in bullet points, numbered lists, or even tables.


๐Ÿ’ก Top Ways to Use ChatGPT Daily

Here are some of the best ways beginners can use this tool right now:

  • Learning New Topics: Ask it to “Explain blockchain technology like I am 10 years old.”

  • Content Creation: Generate ideas, outlines, or full drafts for blogs and social media.

  • Proofreading: Paste your text and ask it to fix spelling and improve clarity.

  • Brainstorming: Get business ideas, gift ideas, or project names in seconds.


๐ŸŒ Conclusion

ChatGPT is a revolutionary tool, but its power depends on how you talk to it. By practicing and writing clearer requests (prompts), you will unlock its full potential to boost your productivity and online income.

๐Ÿ“Œ Ready to explore more? Check out our AI Tools section to discover more amazing free platforms that can upgrade your digital skills today!

How to Make Money with AI in 2026 (Easy Beginner Guide)

A guide on how to make money with AI in 2026 for beginners

๐Ÿ’ฐ How to Make Money with AI in 2026 (Easy Beginner Guide)

Making money online has become easier than ever, thanks to Artificial Intelligence (AI). In 2026, thousands of people are using free AI tools to start successful side hustles and create daily income.

The best part? You do not need to be a tech expert or a professional writer to start. Anyone with a computer or a smartphone can do it.

Here are the best and easiest ways to make money with AI today.

โœ๏ธ 1. Content Writing and Blogging

Many businesses and website owners need daily content, but they do not have the time to write it. You can use tools like ChatGPT or Copy.ai to write high-quality:

  • Blog articles

  • Social media posts

  • Website content

How to monetize: You can offer your writing services on freelance websites like Fiverr or Upwork, or start your own blog and monetize it with Google AdSense.

๐ŸŽจ 2. Digital Art and Graphic Design

AI image generators can turn simple text into beautiful artwork in seconds. You can create unique designs without any drawing skills.

How to monetize: Use AI to design social media graphics, logos, or posters. You can sell these digital designs on platforms like Etsy or offer design services to local businesses.

๐Ÿ“ฑ 3. Creating Faceless Social Media Videos

Short videos (Reels, TikToks, and YouTube Shorts) are booming right now. You can use AI video tools to create engaging videos without ever showing your face or using your voice.

How to monetize:

  • Create short motivational or educational videos.

  • Let AI generate the script and the visuals.

  • Post them on Facebook Pages or TikTok to earn from creator funds or drive traffic to your website.

โš™๏ธ Why AI is the Best Way to Start Online

  • Zero Cost: Most powerful AI tools have free versions.

  • Save Time: What used to take hours now takes seconds โฑ๏ธ

  • No Experience Needed: The AI does the hard work for you ๐Ÿง 

๐ŸŒ Summary

AI is a powerful partner for anyone who wants to build an online income. The secret to success is to start today, choose one method, and practice it daily.

๐Ÿ’ก Want to learn more? Explore our AI Tools section to discover the best free platforms to start your journey.

Best Free AI Tools in 2026 (Ultimate Beginner Guide)

best free AI tools 2026

๐Ÿค– Best Free AI Tools in 2026 (Ultimate Beginner Guide)

Artificial Intelligence is changing the way we work, study, and create content online. In 2026, there are many powerful AI tools available for free that can help you save time and increase productivity.

In this guide, we will explore the best free AI tools 2026 for beginners.


Why free AI tools 2026 are important

๐Ÿš€ 1. ChatGPT

ChatGPT is one of the most popular AI tools in the world. It can help you:

  • Write articles
  • Answer questions
  • Generate ideas
  • Learn new skills

It is perfect for students, freelancers, and online workers.


๐ŸŽจ 2. Canva AI

Canva AI helps you create:

  • Designs
  • Presentations
  • Social media posts

It is very easy to use and does not require design skills.


๐Ÿง  3. Notion AI

Notion AI helps you organize your work and write faster. You can:

  • Take notes
  • Create summaries
  • Plan projects

โšก 4. Copy.ai

Copy.ai is great for writing marketing content, such as:

  • Ads
  • Emails
  • Social media posts

๐Ÿ’ก Why You Should Use AI Tools

AI tools help you:

  • Save time โฑ๏ธ
  • Work faster โšก
  • Increase productivity ๐Ÿ“ˆ
  • Earn money online ๐Ÿ’ฐ

๐ŸŒ Final Thoughts

AI tools are not just for experts. Anyone can start using them today to improve their work and even build online income.

Start exploring these tools and choose the one that fits your needs best.


๐Ÿ‘‰ Want more guides like this? Visit our AI Tools section for more free resources.

Light and Creamy Chocolate Mousseย 

Light and Creamy Chocolate Mousseย  This delightful mousse is perfect for satisfying your sweet tooth without breaking the calorie bank. It's packed with protein and uses low-fat ingredients, making it a great option for those following a diet plan. Indulge in a guilt-free delight with this Light and Creamy Chocolate Mousse! Perfect for those following a dietย  plan or simply looking for a healthier dessert option, this recipe is packed with protein and uses low-fat ingredients. Rich and decadent in flavor without compromising on taste, this mousse is sure to satisfy your sweet tooth without breaking the calorie bank. About Time ย 30 minutes plus 1 hours freezing Yield: 4 Serves. Go to the next page to get the Ingredients Ingredients: 100g tub of quark cheese (skimmed milk soft cheese) 400g container of fat-free natural fromage frais 1 tablespoon of sugar substitute (artificial sweetener) 1 bar of sugar-free chocolate (similar to Cadbury Highlights) Ground cinnamon, for garnish (optional) Cinnamon sticks, for decoration (optional) Go to the next page to get the Instructions Instructions: In a large bowl, combine the quark cheese, most of the fromage frais (reserve some for topping), sweetener, and chopped sugar-free chocolate. Beat the mixture until well combined and smooth. Divide the mousse evenly between four serving glasses. Chill the mousse in the refrigerator for at least an hour, or until set. For serving, top each portion with a dollop of remaining fromage frais and a sprinkle of ground cinnamon, if desired. Garnish with a cinnamon stick for an extra touch of elegance (optional). Tips: You can experiment with different sugar-free chocolate flavors to find your favorite. For a richer chocolate taste, use unsweetened cocoa powder instead of the sugar-free chocolate bar. Adjust the amount of sweetener to your preference. Top the mousse with fresh berries for a refreshing twist. This recipe is a great base, feel free to customize it with your favorite ingredients!

Light and Creamy Chocolate Mousseย 

This delightful mousse is perfect for satisfying your sweet tooth without breaking the calorie bank. It’s packed with protein and uses low-fat ingredients, making it a great option for those following a diet plan.

Indulge in a guilt-free delight with this Light and Creamy Chocolate Mousse! Perfect for those following a dietย  plan or simply looking for a healthier dessert option, this recipe is packed with protein and uses low-fat ingredients. Rich and decadent in flavor without compromising on taste, this mousse is sure to satisfy your sweet tooth without breaking the calorie bank.

About Time

  • ย 30 minutes plus 1 hours freezing
  • Yield: 4 Serves.

Ingredients:

  • 100g tub of quark cheese (skimmed milk soft cheese)
  • 400g container of fat-free natural fromage frais
  • 1 tablespoon of sugar substitute (artificial sweetener)
  • 1 bar of sugar-free chocolate (similar to Cadbury Highlights)
  • Ground cinnamon, for garnish (optional)
  • Cinnamon sticks, for decoration (optional)

Instructions:

  1. In a large bowl, combine the quark cheese, most of the fromage frais (reserve some for topping), sweetener, and chopped sugar-free chocolate.
  2. Beat the mixture until well combined and smooth.
  3. Divide the mousse evenly between four serving glasses.
  4. Chill the mousse in the refrigerator for at least an hour, or until set.
  5. For serving, top each portion with a dollop of remaining fromage frais and a sprinkle of ground cinnamon, if desired.
  6. Garnish with a cinnamon stick for an extra touch of elegance (optional).

Tips:

  1. You can experiment with different sugar-free chocolate flavors to find your favorite.
  2. For a richer chocolate taste, use unsweetened cocoa powder instead of the sugar-free chocolate bar. Adjust the amount of sweetener to your preference.
  3. Top the mousse with fresh berries for a refreshing twist.
  4. This recipe is a great base, feel free to customize it with your favorite ingredients!

Healthy and Delicious Pancakes Recipe

Healthy and Delicious Pancakes Recipe Who says pancakes have to be off limits when you're following a healthy eating plan? These homemade pancakes are a delicious and guilt-free way to start your day! They're made with just a few simple ingredients, and they're low in values, making them the perfect choice for a healthy and satisfying breakfast. Give them a try and let us know what you think! Pancakes are a staple breakfast item that many people love. However, traditional pancake recipes are often high in sugar and fat, making them an unhealthy option for those looking to lose weight or maintain a healthy diet. Luckily, there is a delicious and healthier alternative:ย  homemade pancakes. Total time: 20 Min Difficulty: Low Serves:6 people Go to the next page to get the ingredients Ingredients: 2 large eggs 230ml unsweetened almond drink 1 level tsp sweetener granules, plus 1 level tsp to serve 1 tsp vanilla extract 50g porridge oats 1 level tsp baking powder 50g self-raising flour Low-calorie cooking spray Generous handful of mixed fresh berries, to serve (we used strawberries, blackberries, blueberries and raspberries) Go to the next page to get the instructions Instructions: Preheat your oven to 150ยฐC/fan 130ยฐC/gas 2. Separate the eggs into 2 mixing bowls and, using a fork, whisk the almond drink, sweetener and vanilla extract into the yolks. Stir in the oats and baking powder and leave to soak for 20 minutes. Sift the flour over the oaty mixture and fold it in. Whisk the egg whites into soft peaks and gently fold into the oats using a large metal spoon. Spray a large non-stick frying pan with low-calorie cooking spray and put it over a medium heat. When itโ€™s hot, add a few large spoonfuls of the batter, spaced well apart (youโ€™re aiming to make 12 pancakes altogether). Cook for 2 minutes or until bubbles start to appear in the top of the pancakes and the undersides are nicely golden brown. Flip the pancakes over and cook for another 2 minutes. Put them on a plate, cover with a clean tea towel and keep warm in the oven while you cook the rest. Top with the berries and sprinkle over the extra sweetener to serve. We also served our stack with a sweet berry sauce. Blitz 50g blueberries and 50g raspberries in your food processor along with 1 level tbsp sweetener granules (if you donโ€™t have a food processor, mash them with a fork or potato masher). Press through a fine sieve into a bowl, discarding the seeds in the sieve. Pour the sauce into a jug and chill until needed. Count 1 Syn per level tbsp.

Healthy and Delicious Pancakes Recipe

Healthy and Delicious Pancakes Recipe. Who says pancakes have to be off limits when you’re following a healthy eating plan? These homemade pancakes are a delicious and guilt-free way to start your day! They’re made with just a few simple ingredients, and they’re low in values, making them the perfect choice for a healthy and satisfying breakfast. Give them a try and let us know what you think!

Pancakes are a staple breakfast item that many people love. However, traditional pancake recipes are often high in sugar and fat, making them an unhealthy option for those looking to lose weight or maintain a healthy diet. Luckily, there is a delicious and healthier alternative:ย  homemade pancakes.

  • Total time: 20 Min
  • Difficulty: Low
  • Serves:6 people

Ingredients:

  • 2 large eggs
    230ml unsweetened almond drink
    1 level tsp sweetener granules, plus 1 level tsp to serve
    1 tsp vanilla extract
    50g porridge oats
    1 level tsp baking powder
    50g self-raising flour
    Low-calorie cooking spray
    Generous handful of mixed fresh berries, to serve (we used strawberries, blackberries, blueberries and raspberries)

Instructions:

  • Preheat your oven to 150ยฐC/fan 130ยฐC/gas 2.
  • Separate the eggs into 2 mixing bowls and, using a fork, whisk the almond drink, sweetener and vanilla extract into the yolks. Stir in the oats and baking powder and leave to soak for 20 minutes.
  • Sift the flour over the oaty mixture and fold it in. Whisk the egg whites into soft peaks and gently fold into the oats using a large metal spoon.
  • Spray a large non-stick frying pan with low-calorie cooking spray and put it over a medium heat. When itโ€™s hot, add a few large spoonfuls of the batter, spaced well apart (youโ€™re aiming to make 12 pancakes altogether). Cook for 2 minutes or until bubbles start to appear in the top of the pancakes and the undersides are nicely golden brown. Flip the pancakes over and cook for another 2 minutes. Put them on a plate, cover with a clean tea towel and keep warm in the oven while you cook the rest. Top with the berries and sprinkle over the extra sweetener to serve.
  • We also served our stack with a sweet berry sauce. Blitz 50g blueberries and 50g raspberries in your food processor along with 1 level tbsp sweetener granules (if you donโ€™t have a food processor, mash them with a fork or potato masher). Press through a fine sieve into a bowl, discarding the seeds in the sieve.
  • Pour the sauce into a jug and chill until needed. Count 1 Syn per level tbsp.